Cambo USA -
Cambo USA -
Home
Blog
Register
Dealers
Events
EDU
Downloads
Contact Us
  • Home
  • Blog
  • Register
  • Dealers
  • Events
  • EDU
  • Downloads
  • Contact Us
Actar, Cambo, Cambo Actus

Stepping Up

Pierre Planté - St Tropez (F)  EeStairs BV / October 2021 Cambo Actus
Pierre Planté – St Tropez (F) EeStairs BV / October 2021
Cambo Actus

An article in one of the larger Dutch papers a few weeks ago: “World’s most expensive stairway in French villa built in The Netherlands.” An article like that is useless without pictures and the accompanying photographs do justice to the builder’s craftsmanship and quality standards. It’s also obvious that the commissioned photographer knows how to visualize his client’s work. Hans Morren has been working for EeStairs – builder of the prestigious staircase – for many years. Their assignments have sent him all over the world. Hans values their cooperation a lot, not in the least because every staircase he photographs is a one-of-a-kind.

We actually used one of Hans’ photographs to promote the Actus a couple of years ago. It’s this staircase inside the Akzo Nobel office, shot with the Actar-24 lens and a Sony A7.

Akzo Nobel Amsterdam / EeStairs BV / Februari 2016 Cambo Actus Sony A7 Actar-24
Akzo Nobel Amsterdam / EeStairs BV / Februari 2016
Cambo ACTAR-24

Hans approached us shortly after the introduction of the Actus. His Mamiya-ZD was becoming a bit long in the tooth and he wanted to replace it with a modern mirrorless camera body, with the option to use it as a digital back behind a view camera. The Actus ticked all the boxes. He’s now been using his Actus/Sony combination for six years and the Sony is hardly ever used without the Actus. When shooting a staircase on location the space to maneuver around the object is often limited. Camera adjustments are crucial in those situations.

Hans’ architecture and interior assignments bring him all over the world. But he enjoys working in the studio and the kitchen just as much. In fact, the mixture is crucial to him. The studio work he does is rarely pure product photography but rather the visualization of ideas and thoughts. This brought him such diverse assignments as (classical) record covers, annual reports, book and magazine covers and cook books. An impressive series of cook books. And still Hans doesn’t consider himself a food photographer. As a well-known publisher once told him: “You create wonderful books, but I wouldn’t know how to classify them”. A series of – now eight – cook books was created in cooperation with Roelf Holtrop, a medical doctor and long-time friend with whom he shares a passion for Italian food. Roelf wrote the recipes and text. Hans did not photograph dishes, but made photographs to illustrate the process of creating fine food. He and his wife Liesbeth also took care of the graphic design.

Polaroid 55 material

From La Cucina Povera (Poor Man’s Kitchen). A “cook book for hard times”, as Roelf Holtrop and Hans Morren called their joint effort. It covers the cuisine of the southern part of Italy and is all about wholesome food made with simple (and inexpensive) ingredients.

The ladle serves as a pan and a soup bowl at the same time. The tea light needs to keep the dish warm

Shot on Polaroid 55 material.


Medici Cucina Cambo Actus
From Medici Cucina

Axel Springer Neubau - Berlin (D) Quispel Deurne / June 2021 Cambo Actus
Axel Springer Neubau – Berlin (D) Quispel Deurne / June 2021

More about Hans Morren

August 4, 2022by CamboUSA
FacebookTwitterPinterestGoogle +Stumbleupon
Cambo Actus, Cambo Spotlight, Guest Post

Matthias Conrad: Cambo Actus in the Wild

How did you first fall in love with photography?

Nature and landscapes have always played a big role in my life. I was born in the mid-1970s in a small town in Thuringia, on the edge of Hainich National Park, right in the middle of Germany, where I grew up very close to nature. Trips and vacations with my parents and grandparents often led to nature. I discovered photography very early in my childhood as I toyed around with my parent’s and grandparent’s analog EXA and Praktika cameras, which were made in GDR (German Democratic Republic). 

What started as a small hobby developed over the years into my job and my passion. While I was studying business administration, I also developed my love for travel. My fascination with landscape photography developed through various stays abroad in Canada, Mexico, and the US, all of which have very diverse landscapes.

  • Cambo Actus & the ACTAR-24

From where do you draw your inspiration?

I draw a lot of inspiration from design or architecture, which surrounds me all day long here in Germany. I also draw from my friends who have a strong relationship with photography and/or architecture as well. Old-fashioned location scouting with long hikes in nature is another way I find inspiration. It is an essential part of my process to spend a lot of time in the nature to find new places to shoot. 

  • Cambo Actus & the ACTAR-24

Do you have any specific influences you’d like to share?

I’m not the typical landscape photographer who draws inspiration only from other landscape photographers or artists. I tend to very often look outside the box. I admire the works of Sebastiao Salgado, Ragnar Axelsson or younger photographers like Kiliii Yuyan or Carsten Egevang. Most of their images can tell a story and have more of a photojournalistic approach. I’m also influenced by the minimalistic approach of photographers like Michael Kenna and Hengki Koentjoro.

If you were behind your camera and could choose anything you wanted to be in your viewfinder, where would you be and what would you be looking at?

I would like to go to Antarctica and shoot icebergs in that very special light you often have in the cold regions of our planet.  I’d like to get lost in a town like Valencia in Spain with all its modern architecture. And there is always Switzerland with its amazing glaciers, mountains, vast valleys, wild creeks, and picturesque villages. But I also feel that the location is not as important as being happy with where you are, and having inspirational people with you (that you like) while you shoot. 

  • Cambo Actus & the ACTAR-24

What drew you to the Actus system and what do you like about shooting landscape photography with it?

With my classic camera setup, I was getting more and more frustrated because I felt stuck. I was not able to create the shots I wanted. Especially in landscape photography, I was frustrated with the look ultra-wide-angle lenses are creating. I constantly had to make compromises with lens distortions – mountains or waterfalls in the background started to look tiny compared to what the scenery really looked like. The game-changer for me was that, with the Actus system, I could shift the camera body – I was able to capture scenes as a panoramic shot with the right proportions. I’m very thankful that Richard Lotte from Cambo Netherlands gave me an Actus System for testing. After trying the Cambo Actus system for the first time in landscape photography, I was impressed by the ease of use, and it made it so simple to create panoramic shots, selecting the right depth of field. I’m just starting to understand the endless possibilities and how I can achieve a unique style in my photography. 

  • Cambo Actus & the ACTAR-24

A lot of new photographers consider a view camera “Old School.” What are the advantages you see shooting with an Actus instead of a DSLR?

It looks a bit old school and intimidating at first sight but when you start using and understanding the view camera, everything feels easy and it becomes a very modern tool. In my opinion, the Cambo Actus system is superior compared to classic tilt-shift lenses because you have the additional function of the camera shift for panoramic compositions. When using longer focal lengths like the 60mm, you can use that lens, of course, for classic landscape or product photography but you can also use that lens for macro photography. With a system like the Actus, you have to be more thoughtful and you need to be more focused on the composition you have in mind. You have to set up everything in advance for the optimal shooting results – but that’s a good thing. The camera system slows you down a little bit while shooting, but in the end, it makes post-processing much smoother. I never had it so easy with stitching panoramic shots. Another advantage is that the system itself is very flexible. Not only was I able to use the Cambo Actar 24mm and 60mm, I can use the Pentax’ 45-85mm and Pentax’ 75mm medium format lens on the same system. Then when I’m not using my Sony A7RIII body, I can attach a Fuji GFX, EOS R, Nikon Z or a Hasselblad X1D Camera body. There are so many lens-camera-combinations possible with the Actus system.

  • Cambo Actus & the ACTAR-24

What is the next path you see your creativity taking your photography?

With a view camera, your own creativity is getting back more in focus and with a tool like the Actus it is easier to achieve the style of photography I’m looking for. I will do more architectural photos, create more unique product photos with a more defined plane of focus, and of course, more panoramic pictures to get the right perspective of waterfalls and mountains. 

  • Cambo Actus & the ACTAR-24
  • Cambo Actus & the ACTAR-24

You can see more of Matthias Conrad’s work on Instagram @matthconphoto. All photos used with permission of the artist.

November 16, 2020by CamboUSA
FacebookTwitterPinterestGoogle +Stumbleupon
Actar, Cambo Actus, Cambo DSLR, Guest Post, Review

Lee Varis: Testing the Ultimate Technical Camera – Part 2

Words and Photos by Lee Varis of Varis Photomedia

This 2nd part of my examination of the Cambo Actus GFX system focuses (literally) on the lens tilting functionality. The tilting lens stage allows the photographer to alter the plane of focus, usually to match the plane of focus with the subject, to achieve better depth of focus with near-to-far subjects, or with macro focus situations.

The Cambo Actus technical camera system allows the front lens stage to tilt, altering the plane of focus to match the subject.

This lens tilt takes advantage of the Scheimpflug principle, a geometric rule that describes the orientation of the plane of focus of an optical system (such as a camera) when the lens plane is not parallel to the image plane.

Tilting the lens such that the desired plane of focus intersects the plane of the lens, and the image plane at one point, known as the Scheimflug intersection, is the core function of the Scheimpflug principle.

Arranging the lens tilt so that the desired plane of focus intersects with the image plane, and the lens plane, at the same point, allows for enhanced focus along that focus plane without resorting to extra small ƒ-stops, and in most cases achieves sharper focus in the desired area. The following image illustrates how this works in practice. The first image has the lens plane parallel to the camera back, and the result is a limited depth of field that is particularly troublesome for near-to-far subjects…

Here the back of the camera and the lens plane are parallel in a normal orientation—the focus is on the guitar pick which is very close to the lens—the focus falls off into the distance.

The second image has the lens tilted forward so that the lens plane intersects the plane of the face of the guitar, and the back of the camera—the result is an illusion of infinite focus or extended depth of field, even at a wide open ƒ-stop…

Here the lens has been tilted forward enough that the plane of focus matches the face of the guitar, and we have perfect focus along the whole length of the guitar, near-to-far.

The beauty of the medium format, mirrorless FUJIFILM GFX is that focus peaking in the electronic viewfinder makes the chore of determining the best angle for the lens easy—just tilt the lens until the red highlights show up along the edges in the image!

Besides the obvious application here in the still life above, subtle lens tilts can work wonders in ultra-close-up macro photography. This is something the Cambo Actus system excels at…

The Cambo Actus GFX with the 90mm Actar lens is ideal for extreme macro work. Small lens tilts can greatly enhance the apparent depth of focus at closer than 1:1 magnification distances.

Here the lens has been tilted to place the focus across the plane of the flower center. Closing down the ƒ-stop just a bit extends the depth enough that all of the petals are also tack sharp!

There is nothing quite so luxurious as a view camera for macro photography, and the Cambo Actus GFX is a joy to use with extremely precise geared focus movements along the extended rail—the focus peaking of the FUJIFILM GFX is fantastic for nailing the focus.

The Scheimpflug principle also has application in landscape photography…

Here I’m setting up a shot with foreground rocks leading up to the lighthouse—an extreme near-to-far composition.

The foreground rocks are only 24 inches from the front of the lens with the light house over one hundred feet away.

There is no way to achieve this level of depth of focus in a single capture without the use of a tilting lens stage.

While it is possible to capture several shots with differing focus depths, and merge them using focus stacking, the look of the Scheimpflug capture achieves a subtle “standing in the scene” kind of feel that just works better for this type of image!

Here is a short video showing another shot from the same day of shooting…


The Cambo Actus with the FUJIFILM GFX is truly the ultimate technical camera for demanding photography in architecture, still life, and landscape applications. While the system is not cheap… roughly $2,795.00 for the Cambo Actus, another $1000 – 1700 or so for a large coverage view camera prime lens, and you’d still need to purchase the FUJIFILM GFX body ($6499.95 from B&H) , if you are looking for the ultimate technical system, this is it!

I was able to borrow the system for a only a week, and had limited time to work with it, but I really enjoyed working with the system. This camera inspired many ideas for photographs that I would like to pursue at some point in the near future. In the meantime, here is a gallery of images from my testing—click on the thumbnails below to see larger images! You can find out more about the Cambo Actus system of cameras, available with adapters for Canon, Nikon, Sony, and Fuji-X, from their website here: https://www.cambo.com/en/actus-mini/cambo-actus-mini-view-camera/


Words and Photos by Lee Varis – Source: Cambo Actus + FUJIFILM GFX

Once again a huge thank you to Lee for his very in depth review. To purchase a Cambo Actus GFX or any of the many other Cambo products, please visit Cambousa.com/dealers to find the Cambo dealer nearest you.!


July 10, 2017by CamboUSA
FacebookTwitterPinterestGoogle +Stumbleupon
Actar, Cambo Actus, Cambo DSLR, Guest Post, Review

Lee Varis: Testing the Ultimate Technical Camera – Part 1

Words and Photos by Lee Varis of Varis Photomedia

I recently had the opportunity to test the Cambo Actus technical camera with the FUJIFILM GFX—this was very exciting for me because I could renew my experience with view cameras in a new digital configuration! The Cambo Actus is essentially a view camera front end to just about any digital camera that gives the serious photographer the ability to use full lens tilt & shift with back shift.

The Cambo Actus consists of a front lens board with tilt/shift on a rail system with a bag bellows that connects the front lens to the back board using a clever magnetic attachment.

The Cambo Actus system uses large image circle view camera or enlarger lenses connected to a digital camera body through a bag bellows and a body adapter back standard. Basically replacing a view camera film holder with a digital camera body. I had the system set up for the amazing FUJIFILM GFX, a medium format 50 megapixel camera, and had an Actor 24mm & 90mm lens to test the full tilt/shift capabilities of the system.

The shifting function of this type of camera system is primarily used in architectural photography to control perspective convergence. This was how we had to work before the days of Photoshop and Lightroom lens corrections. The idea is to keep the camera back perfectly vertical and use the shifting back to get the top of a building in the shot. A carpenter’s bubble level is very useful to square up the camera…

Here is a short video where I show the process with the Cambo Actus and FUJIFILM GFX…

I was using the Actar 24mm with is fairly wide angle for the GFX medium format camera.

Here you can see the perspective convergence in the building behind me. It was actually much more severe in the un shifted GFX shot—it makes the building look like its leaning backward!

Sometimes when the image is perfectly corrected with all the lines parallel, it can look a little off, like its over corrected. You might have to deliberately under-correct (allow for slight convergence)  to make it look right…

The shape of this building still looks a little strange, even though it is technically correct.

The shifting back of the Cambo Actus is also extremely helpful when stitching multiple shots together to get undistorted wide angle shots! I took advantage of the horizontal shift to capture a shot of the Ames Free Library in Easton Massachusetts when the best vantage point for the building was too close to show enough of the scene.

Instead of panning the camera, I shifted the back left to right to get 3 shots of the scene.

Shifting the back of the Cambo Actus allows for perfect alignment with the building, so all the lines are parallel, and multiple shots blend together seamlessly with no effort. The image below shows the individual shots shifted to the extremes of the extra large image circle…

This sequence shows the extreme shift inside the image circle of the lens!

The result after merging in Lightroom/Photoshop…

I added a better sky into the merged scene in Photoshop, but the panorama merge was done in Lightroom.

The Cambo Actus system is definitely the big boy way to shoot architecture, but the camera has many other applications that take advantage of a tilting lens! Stay tuned for part two of my exploration of the Cambo Actus GFX where I look at achieving infinite depth of field effects with a tilting lens!

Words and Photos by Lee Varis – Source: Cambo Actus & FUJIFILM GFX

Please take the time to visit Lee’s website varis.com for more great reviews, tutorials, and stellar images.

Thank you Lee for taking the time to test and share the Actus GFX. For more information or to purchase one of your own please visit Cambousa.com/dealers to find the dealer nearest you.

Stay tuned for Part 2 of Lee’s review coming soon!

July 7, 2017by CamboUSA
FacebookTwitterPinterestGoogle +Stumbleupon
Actar, Cambo Actus, Guest Post

Guest Post: Bryan Minear – A Week With The Actus Mini.

Recently we reached out to Bryan Minear, Fuji X-Photographer, to offer a test of the Cambo Actus-Mini for the Fuji-X platform. Here are his thoughts. 

Photos and text by Bryan Minear. Shared here with his permission.

I don’t write as often as I’d like to. So when Cambo USA reached out to tell me about the Actus Mini with Fujifilm X compatibility, I instantly knew that if I could get it in my hands, I would want to write about it. This isn’t really going to be a “review” because I really hate writing a typical review. This will be more or less my thoughts on a really cool photography tool that I feel more people should know about.

After some back and forth with Cambo, we nailed down a week that I could try out the system. I planned a cool weekend trip to take it on that unfortunately ended up getting cancelled due to weather, but more on that later.

For those that aren’t familiar with a traditional “view” camera. Think old school 8×10 photographer under the sheet with a huge camera that looks like an accordion. The bellows are light sealed and allow the lens to move back and forth from the film plane which acts as your focus wheel. The lens can also move side to side and up and down as well allowing for “tilt” and “shift” to correct for perspective or to give that artsy blur effect.

Well the Actus Mini basically functions in the same way. The back of the Actus has a mount for your camera system body and the front has a lens mount. They offer a few different camera mounts but Fujifilm is the only one that I care about for the sake of this writing.

Cambo themselves make a few lenses, but they also have adaptors for other lens manufacturers which is really cool. An APSC system like Fujifilm X allows for the use of Nikon, Leica, Mamiya 645 and RZ/RB, Pentax 645, and Hasselblad lenses. And large format lenses 55mm and longer. For my testing they sent me the Actar 24mm f/3.5 which ended up being the perfect all around focal length, especially with how much i was shooting panoramas. All sample images below were shot with an X-Pro2 attached to the Actus Mini. If the shot is a panorama, I made a note of it, otherwise its just a single exposure.

Because the lenses are designed to resolve at such a larger size, it allows you to shift the sensor around within the frame. Not only can you tilt and shift the lens on the front, but the rear camera mount moves side to side and up and down independently as well. This allows you to capture panoramas with NO distortion whatsoever. You are essentially moving the sensor around the lens area shot by shot so you can combine them into perfectly stitched panoramas in post. I know that photoshop has come a long was with perspective correction tools, but there is no software that allows you to create panoramas like this. I have to say that ending up with super high resolution panoramas is perfect for printing.

5 image panorama

One of the coolest things about the Actus Mini is the size. I’m a huge fan of shooting on tripods. I love to slow down and add filters and do things very methodically. The bottom of the Actus is totally Arca-Swiss compatible so it is ready to be mounted without any sort of added plate. But it’s size also allows you to hand hold the entire system. It gets a little tough if you are wanting to do a lot of tilt and shift movements, but it’s totally possible. The build quality of this thing is incredible. It just feels very solid and well engineered. The whole system breaks down very quickly. The bellows are attached the the front and back by a genius magnetic connection that locks you into place, and it folds down completely flat for storage.

I was in constant communication with Cambo the week that I was testing. They wanted to make sure to answer any questions that I had. I asked them what kinds of fields they saw this being most useful in. Knowing that in my world of landscape and architecture the perspective adjustments and panorama capabilities are a huge deal. But they also informed me that this system would be great for product and portrait photographers because it allows for such intricate depth of field plane control.


My week looked like this: I hit a few of my local hotspots after work just totally in “play” mode to get a feel for the controls and how it would fit into “my style” of work. Knowing that I had a trip planned for the weekend where I was REALLY going to put it through its paces in the field I really just wanted to get better acquainted with the functions so i knew what to do when i had a real subject to shoot. As is my luck, the weather for the weekend soured last minute and we ended up canceling our trip. Just know that I HATE reading online reviews and seeing mediocre sample images that do nothing to show off the product being reviewed. I shot what I could in the time I had, but Michigan had other plans and the entire weekend was a bust. I just have to beg you, the reader, for forgiveness because my final images aren’t as good as the could be. C’est la vie. Hopefully you get an idea of what the system can really do. I hope to get my hands back on one of these for a New York or Chicago trip to really put it to work in the architectural realm.


If you have any specific questions about the system, please feel free to comment below or shoot me a message on twitter or instagram

Or reach out to them directly at Cambousa.com | info@cambousa.com or by phone 404-859-5809.

And hopefully I can talk my wife into letting me buy one. ?

Until next time!

5-Shot Panorama

Go to top

Bryan Minear is an Official Fujifilm X-Photographer & Vanguard Professional based in the Midwest.
Follow his photographic journey on Instagram, Twitter, and Facebook.

June 5, 2017by CamboUSA
FacebookTwitterPinterestGoogle +Stumbleupon
Cambo Actus, News

NEW ACTAR 80/90/120 Lenses

actar-lenses_serie01_w

The ACTAR series now consists of 5 lenses!  Joining the existing ACTAR-24 and ACTAR-60 we now are pleased to announce the addition of the ACTAR-80, ACTAR-90 and ACTAR-120.

Designed exclusively for use with the ACTUS camera system, these lenses come pre-mounted to an ACTUS Lens Board and ready to use.

Actar 90/Actar 90

Cambo’s ACTAR-80 and ACTAR-90 are 80mm and 90mm standard lenses, dedicated to the Cambo Actus series. Both will focus at infinity in combination with mirrorless camera bodies as well as DSLR bodies. Both ACTAR-80/90 lenses are ideal for product photography, including fashion, food and jewelry.

An extensive image circle of 85 to 90mm, allows for horizontal shifts over more than 20mm each side when using a full frame (24×36) sensor in either landscape or portrait mode. The optical design of this lens is a 7 element, of which all lenses are multicoated to achieve the best contrast.

actar-80s

Actar 80
-focal length: 80mm
-aperture range: f 4 – 22
-filter thread: m40.5
-lens design: 7 elements
-image circle: 85mm
-built for: Cambo Actus (non DB)

actar-90s

Actar 90
-focal length: 90mm
-aperture range: f 4. – 22
-filter thread: m40.5
-lens design: 7 elements
-image circle: 90mm
-built for: Cambo Actus (non DB)

Actar 120

Cambo’s ACTAR-120 is a macro lens with a focal length of 120mm, dedicated to the Cambo Actus series. It will focus until infinity in combination with all mirrorless and DSLR camera bodies. The ACTAR-120 is a lens which is primarily designed for an optimal performance at close-up range, between 1:1 and 1:10. Nevertheless, this lens can also be used for general purpose photography. The design of this lens is build of 6 elements, of which all lenses are multicoated to achieve the best contrast.

actar-120_2s

Actar 120
-focal length: 120mm
-aperture range: f 5.6 – 32
-filter thread: m40.5
-lens design: 6 elements
-image circle: 100mm
-built for: Cambo Actus (non DB)


All of these are available now.

A dedicated Lens hood for the ACTAR-24 is in the works and will be announced soon

January 18, 2017by CamboUSA
FacebookTwitterPinterestGoogle +Stumbleupon
Cambo Actus

Stitching images with Actar Lenses and the Cambo Actus-Mini

Our partners over at the Cambo official blog just shared a few tests of the Actar 24 and Actar 60 lenses when used for image stitching. I know a lot of you have been wondering about the possibilities of what can be created using these two brand new lens options, and I couldn’t just let this pass by un-noticed! 

Cambo has built a reputation for designing and manufacturing technical cameras and more recently the Actus system has been proven a favorite choice for many landscape and architectural photographer.

During the recent On Landscape Conference “A Meeting of Minds” the Actus was on show along with the Actar 24mm and 60mm lenses.

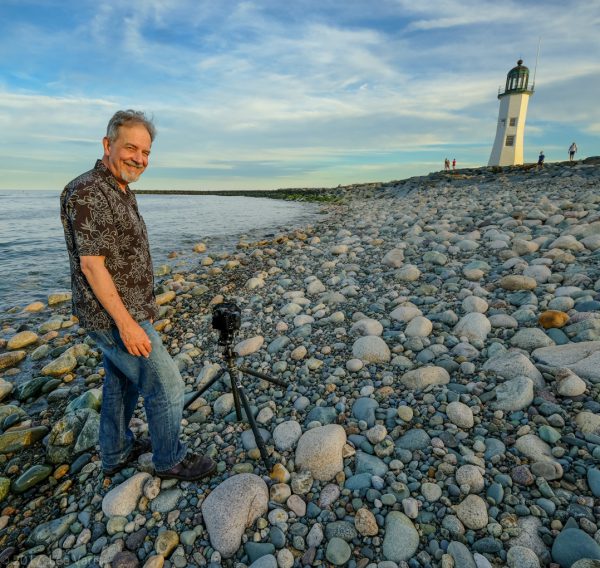
The weather was horrendous and once the storms disappeared we ventured out to test the current Actar lens offerings.

charles1


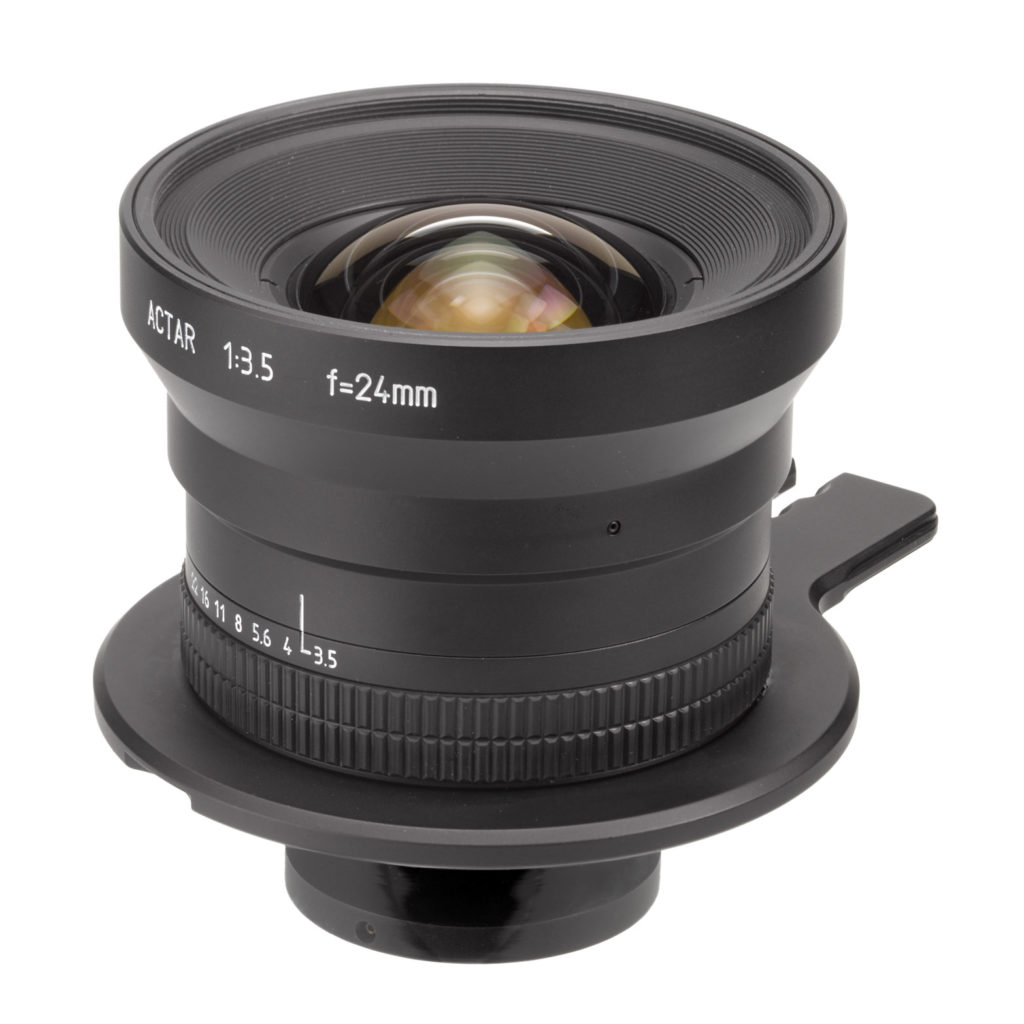
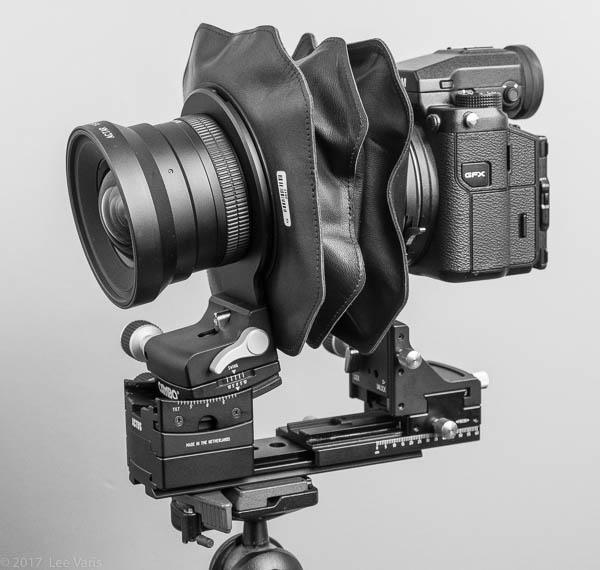
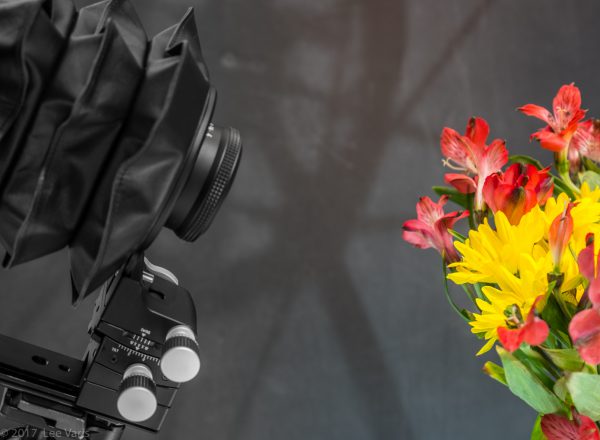
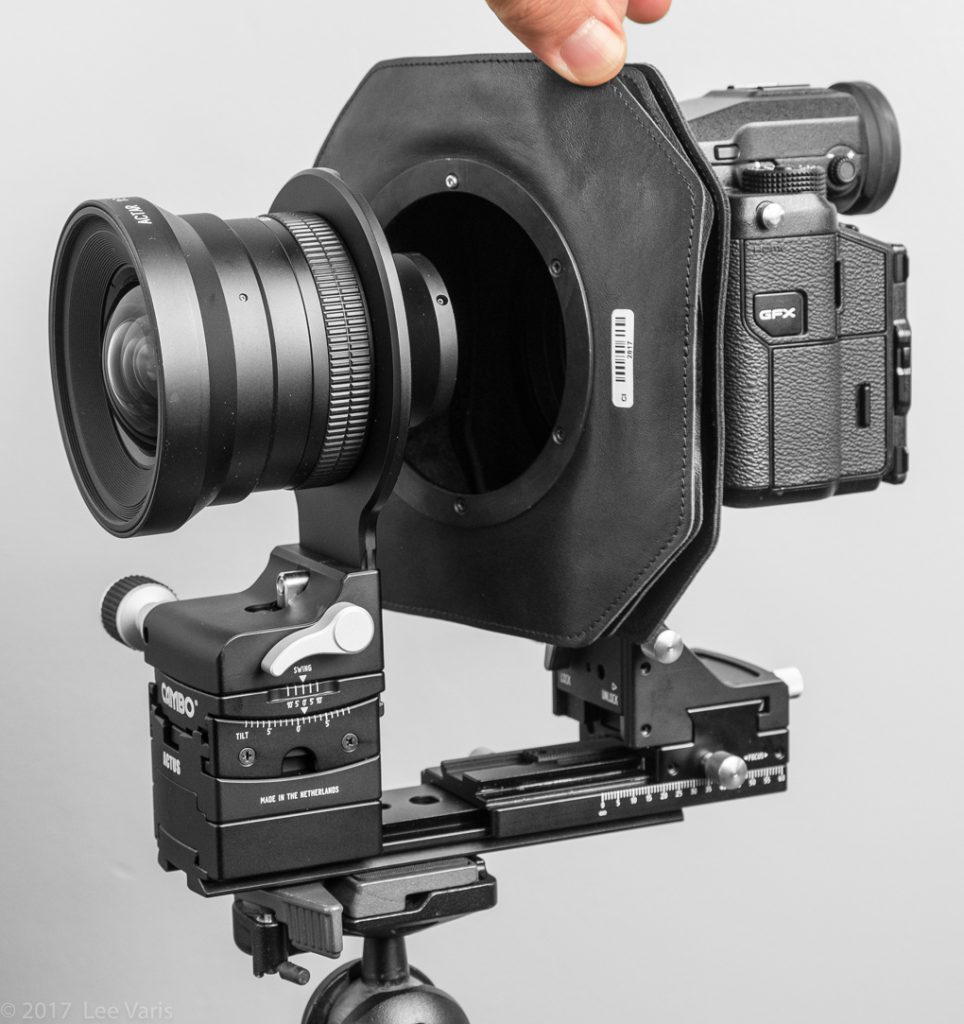
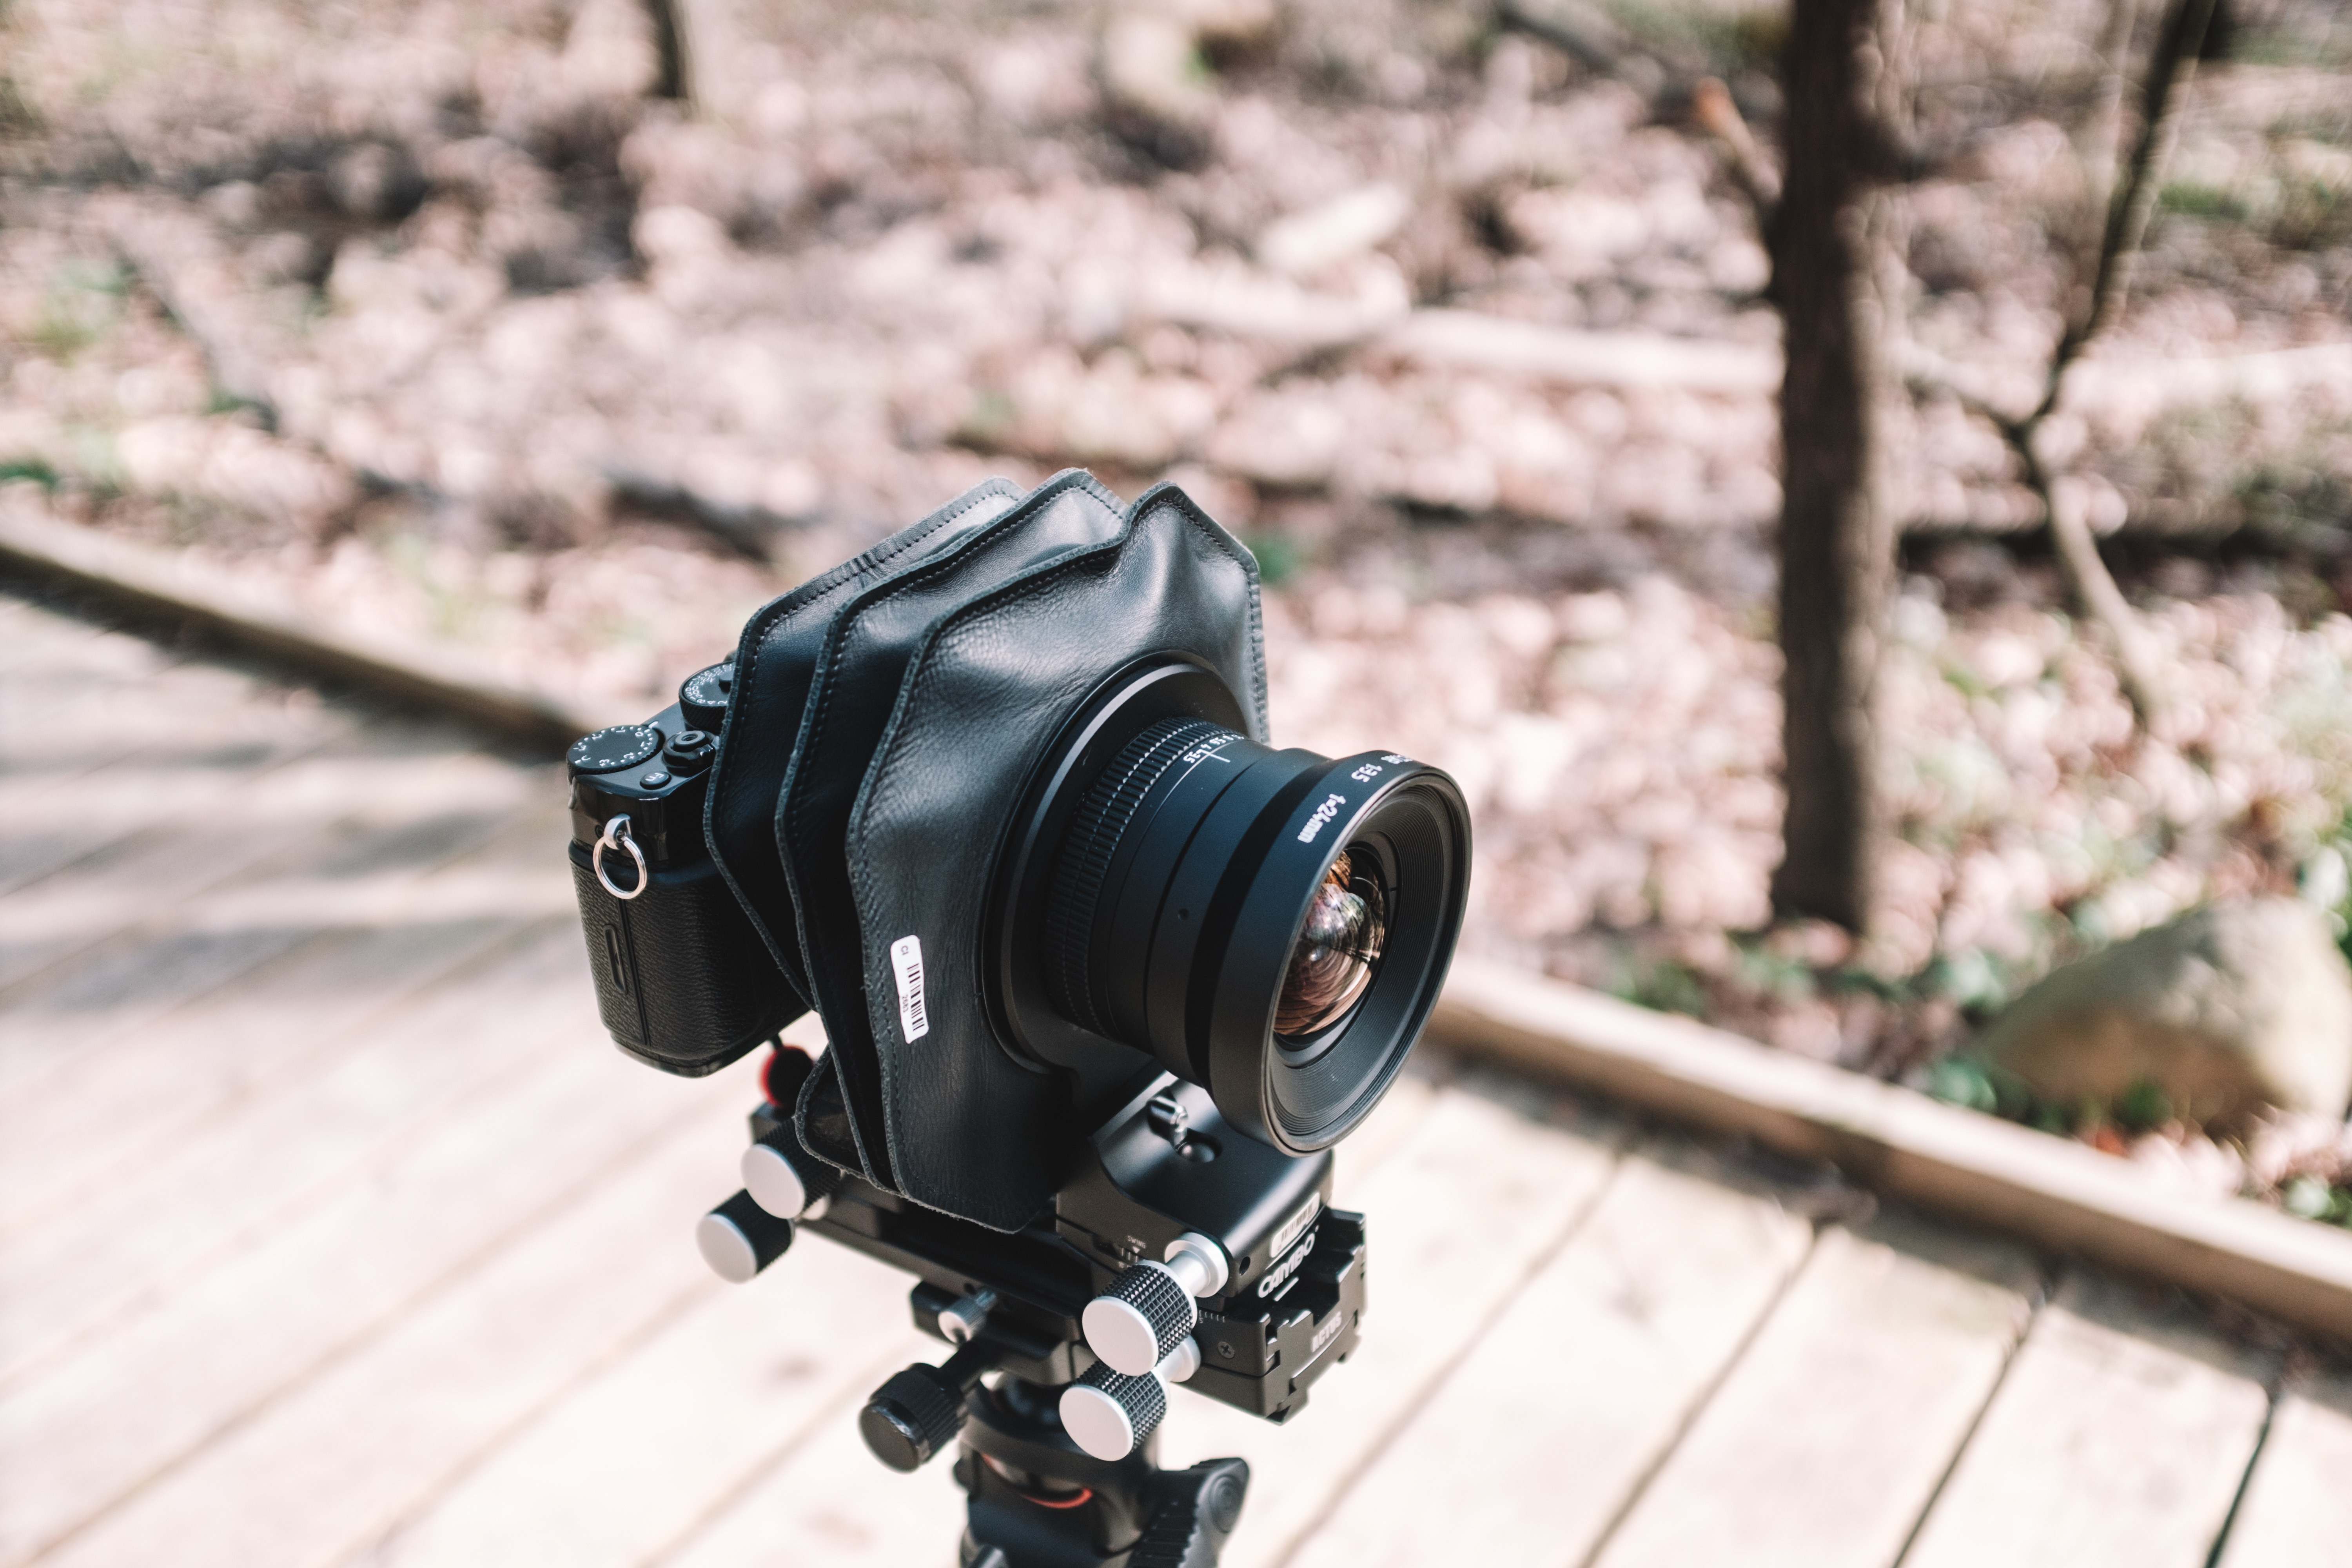
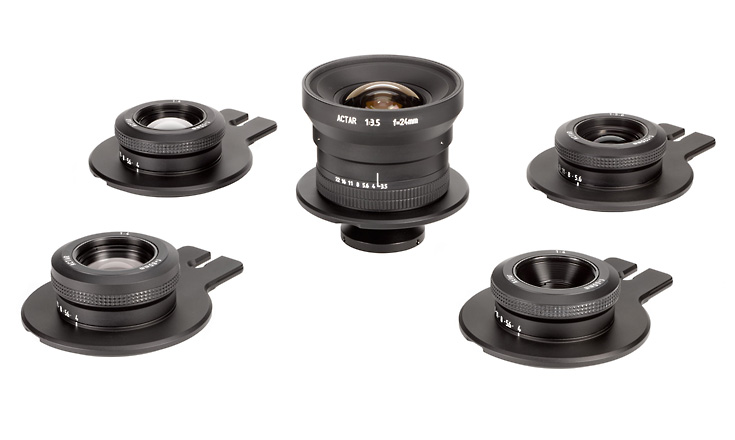
The Actar 24mm is specifically designed for use with the Actus. It comes complete with a lens plate that locks direct into the front standard.

Although photographers are adopting mirrorless camera systems a majority of users still have DSLR systems from Canon and Nikon and require a wide-angle lens that will focus at the extra distance required to compensate for the mirror box. This is the reason why there is a large rear element on this lens.

screen-shot-2016-11-30-at-2-47-52-pm

When using a mirrorless camera the focus is racked back a little more away from the lens than a DSLR with mirror box. The lens is inserted into the front standard and locked in place by a lever. Before you shoot any images it is important to find the lens infinity point. Your dealer can show you how to do this, although we will cover this in another blog.

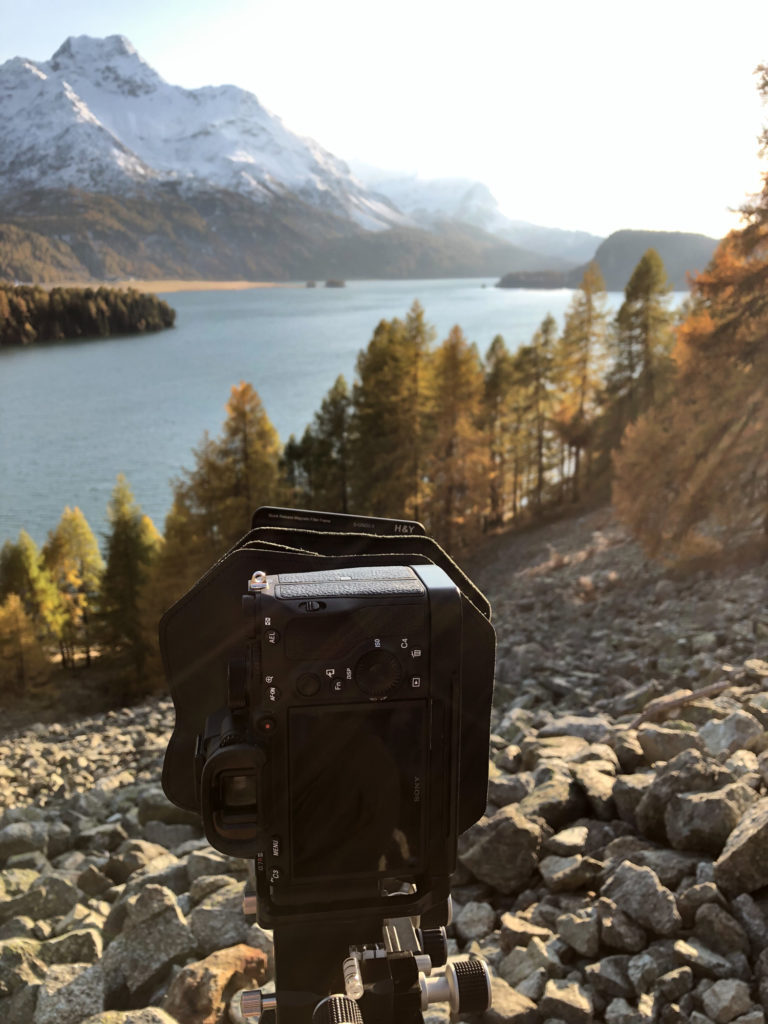
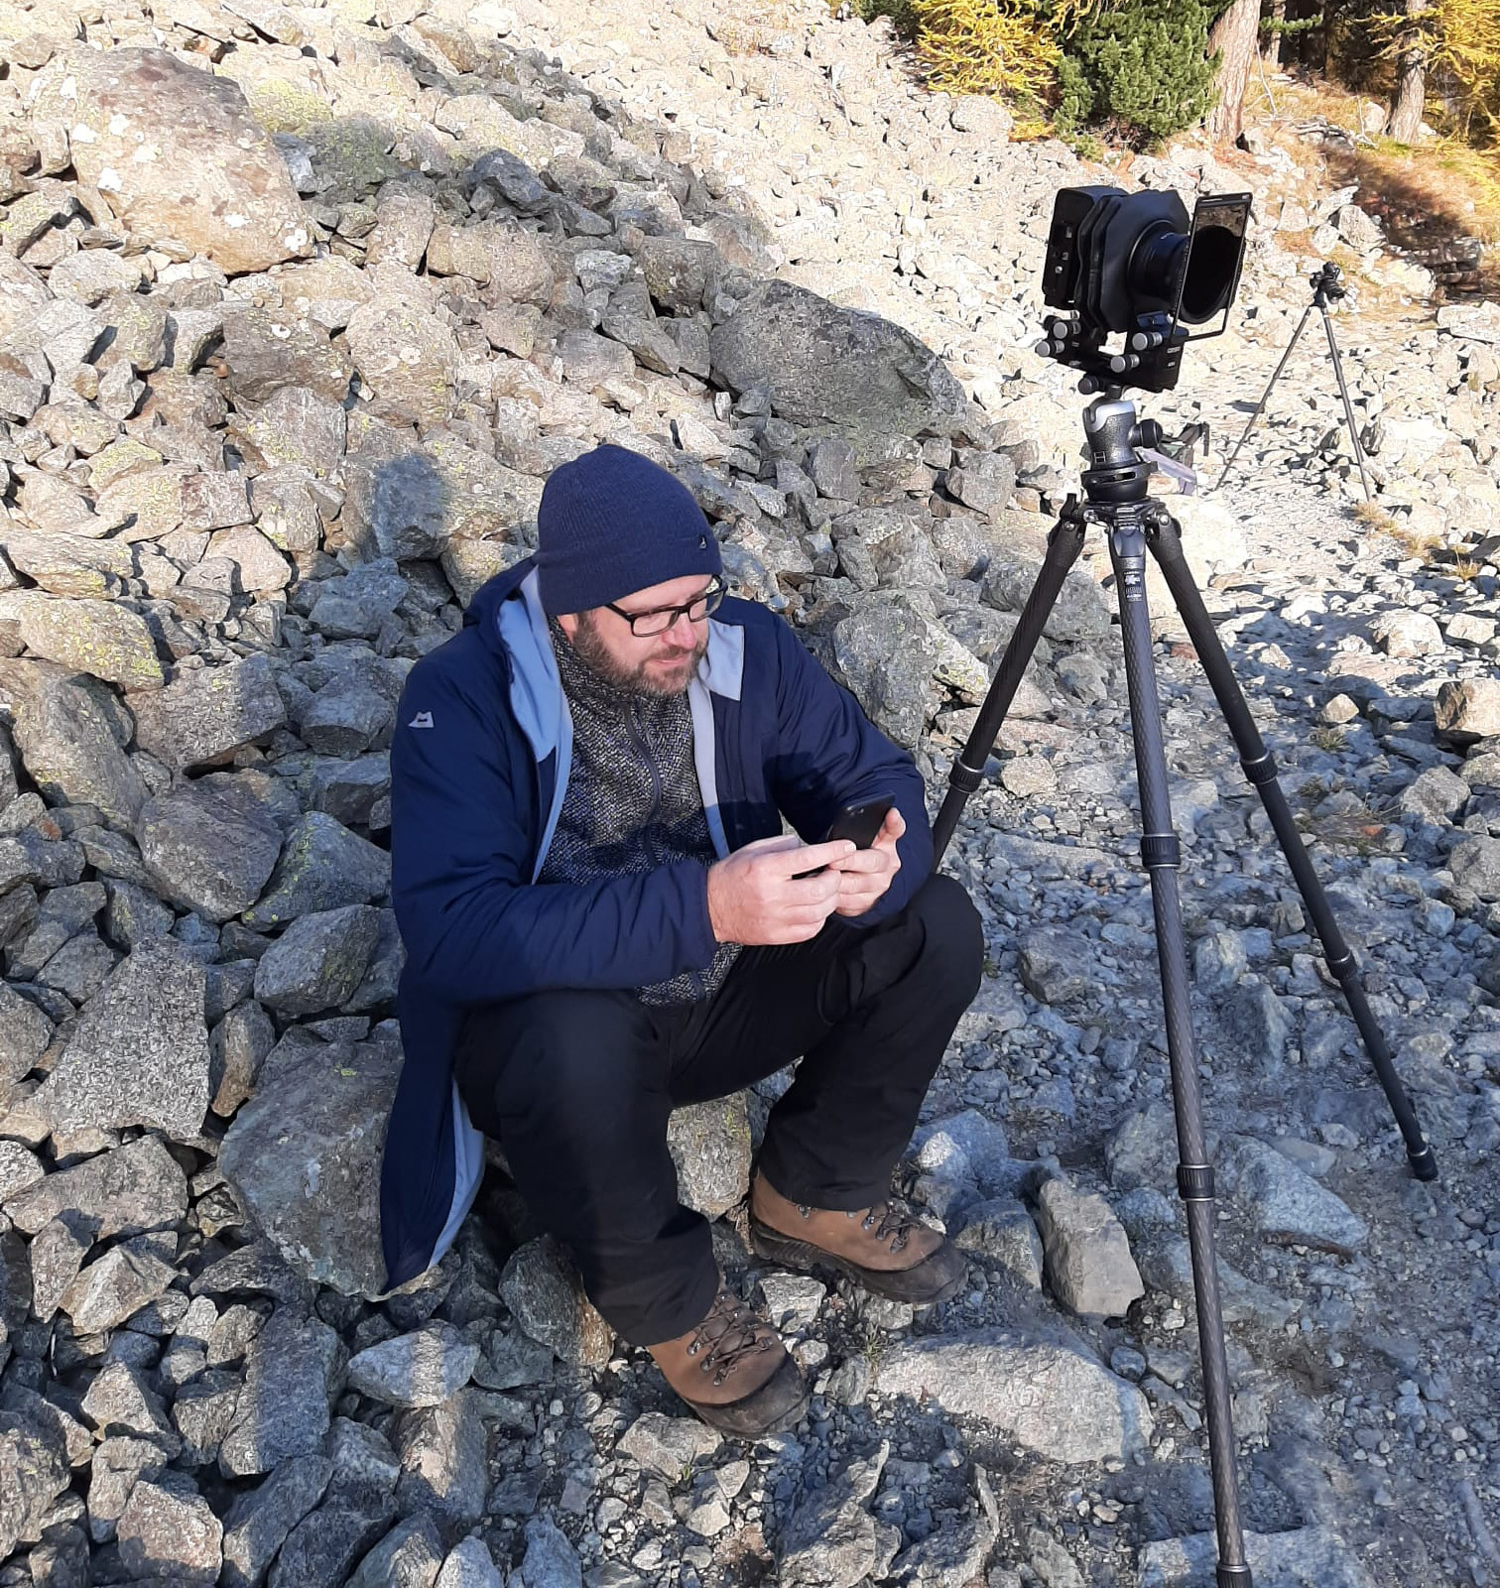
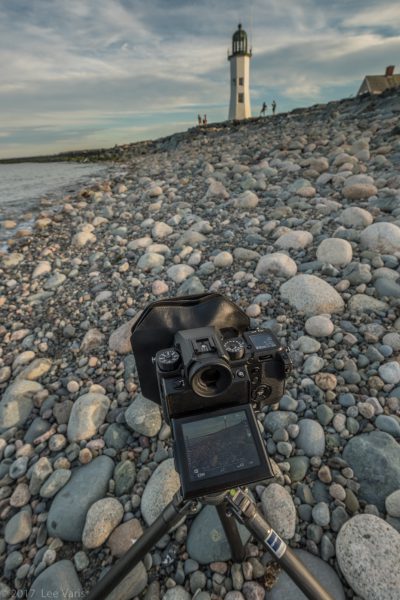
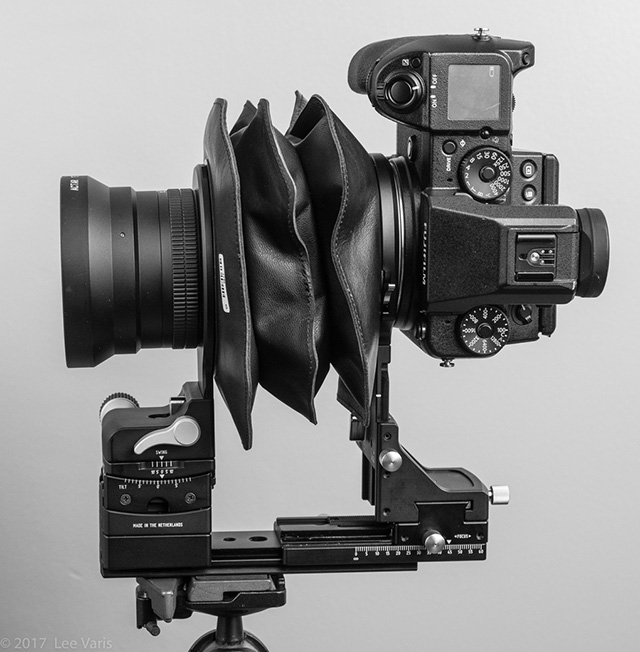
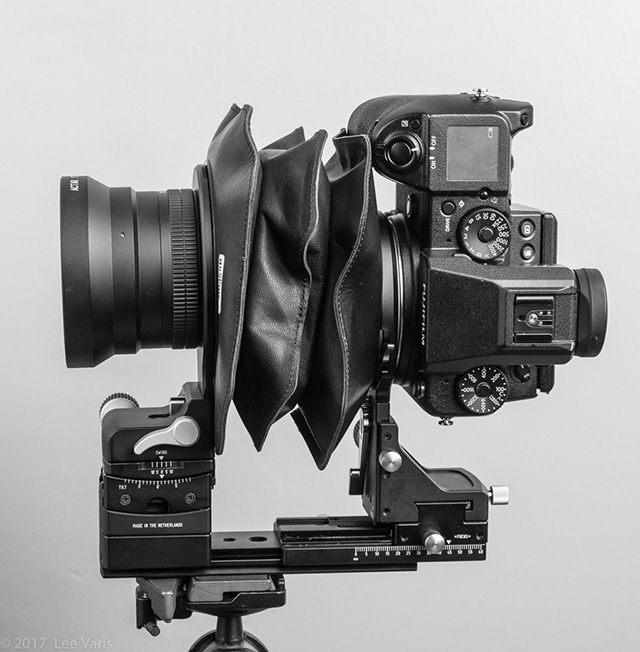
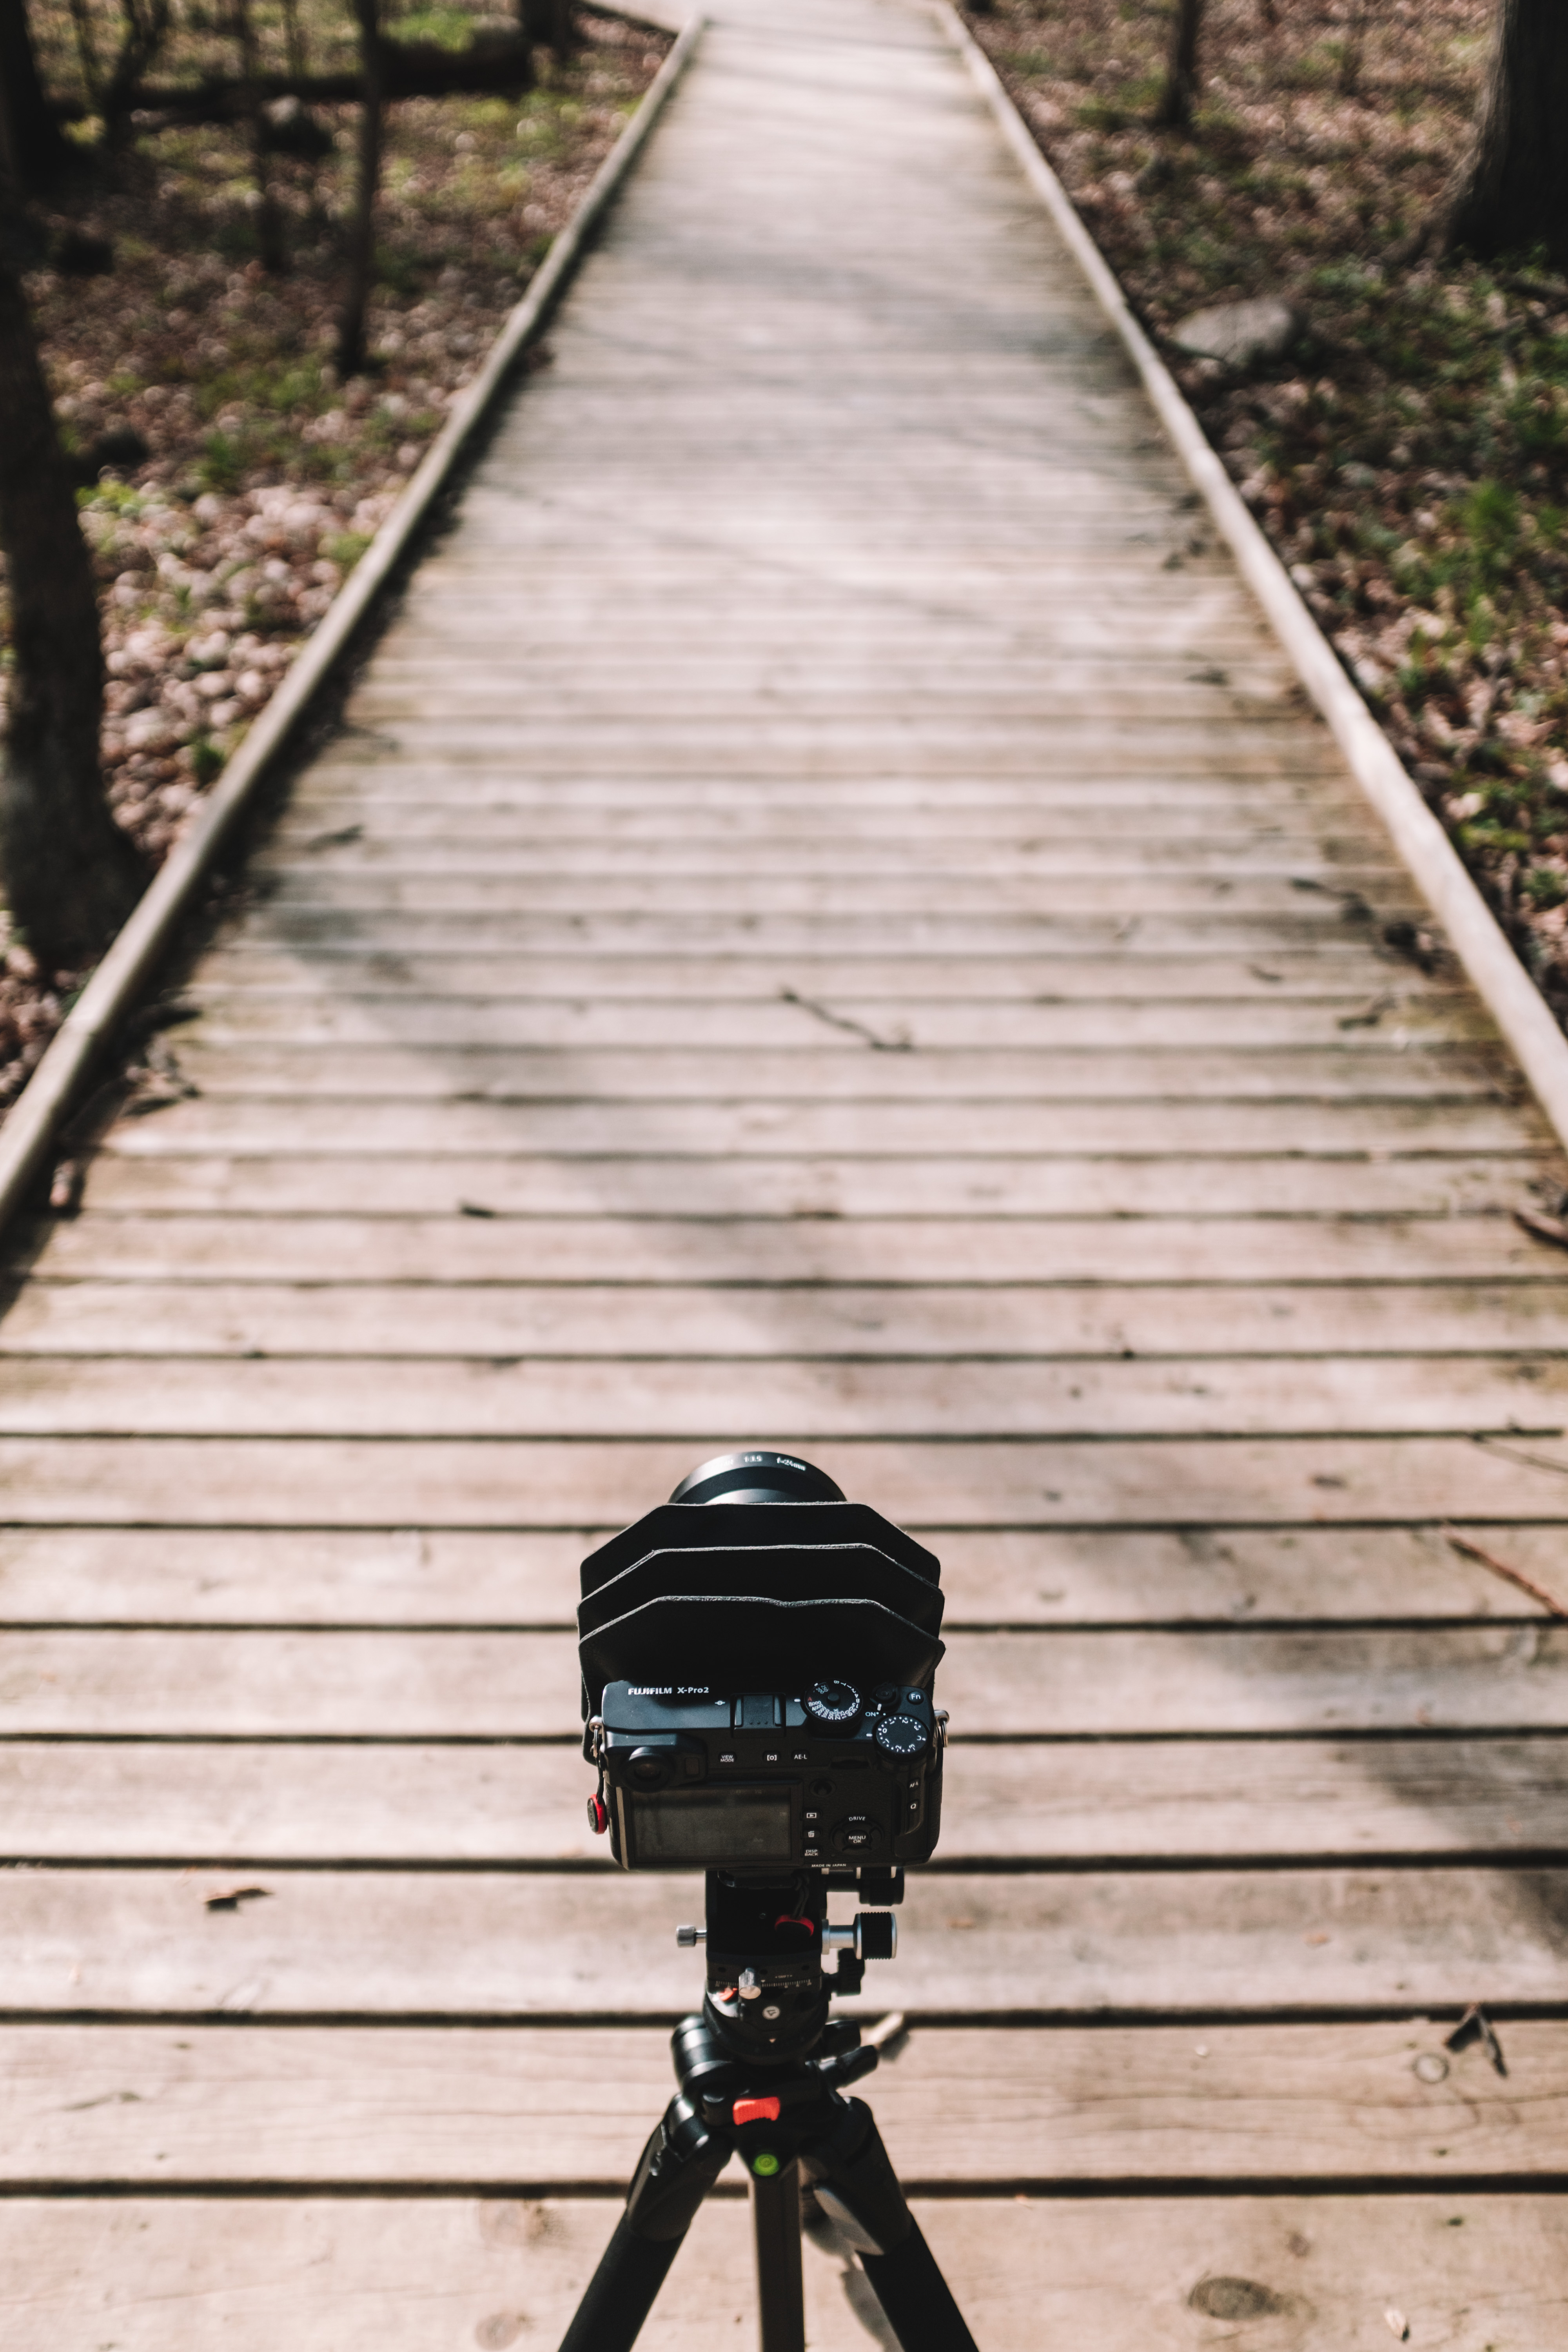
For this test we used the following; Cambo Actus Mini View Camera, Sony A7R, Actar 24mm lens, Standard bellows, CBH-6 ball and socket head and Manfrotto 055 CF tripod.

Using the Sony to meter the exposure at ISO50 was 1/8 sec at F16. The RAW file was captured with generic Sony profile and 2-second self-timer to avoid camera shake.

actar24mmmid1

The lens image circle is quite large, 60mm, so the Actus can be shifted horizontally 12mm left and 12mm right. For this shot we shifted 10mm left and 10mm right.

Once the RAW files were captured we imported the files into Capture One Sony Express and processed them using the Sony Generic profile and saved as a TIFF file to preserve the data.

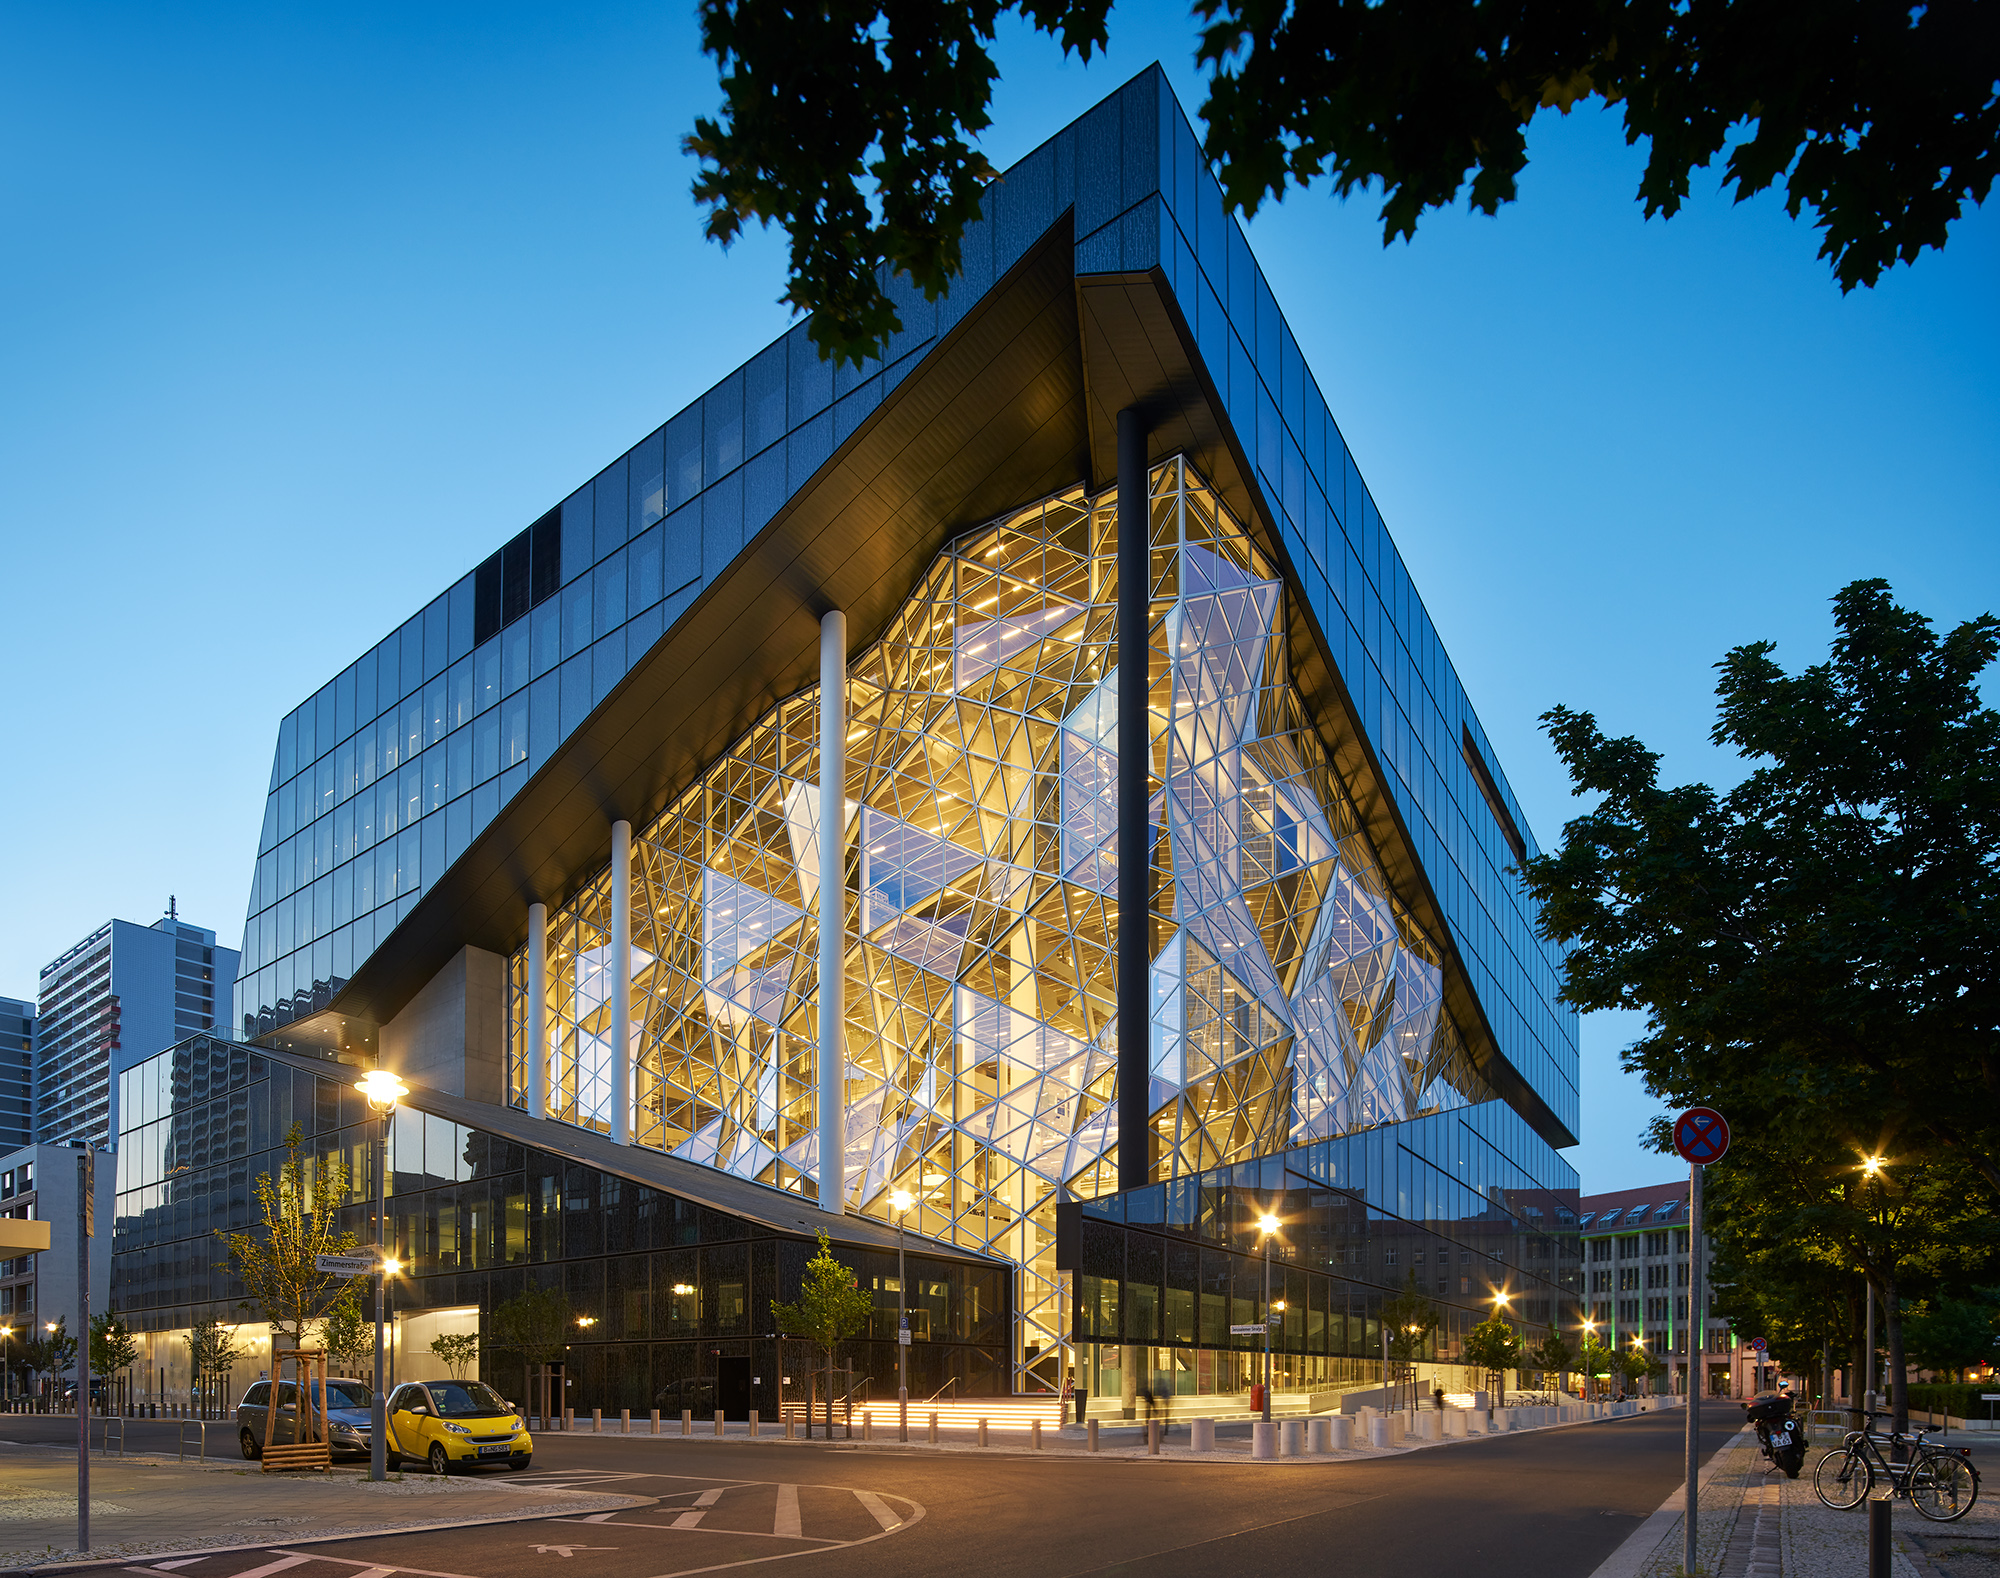
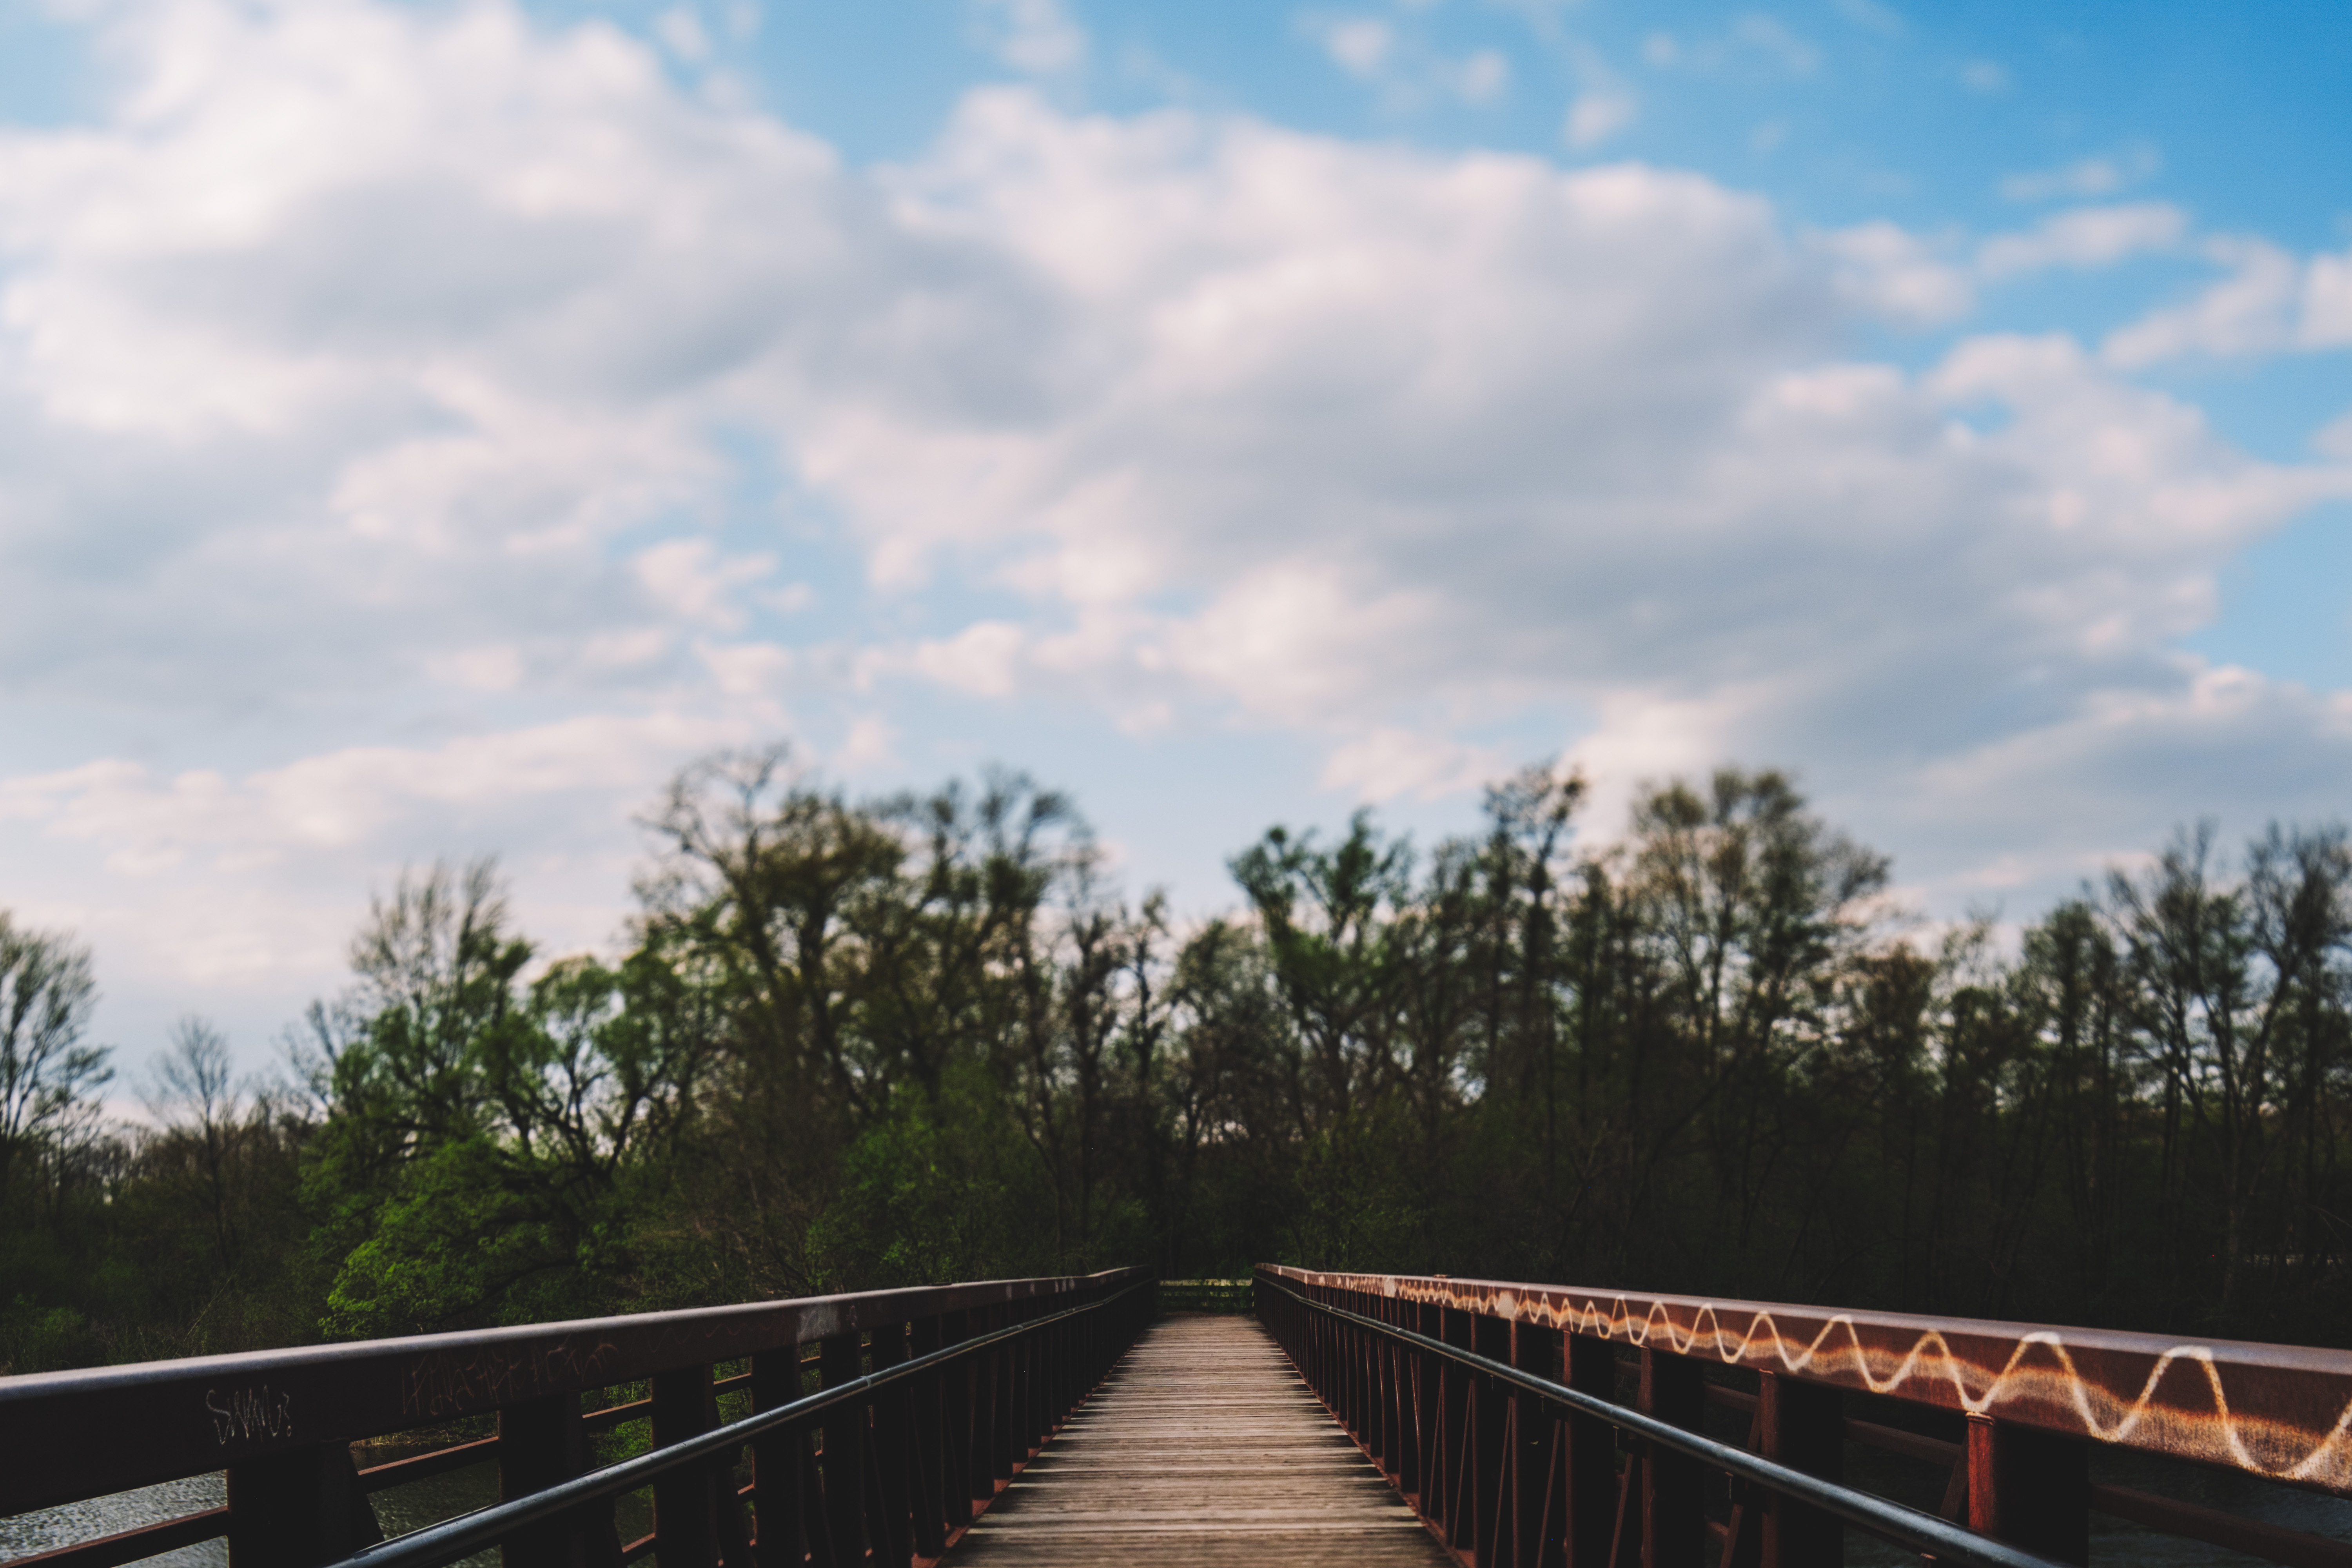
Capture One pre-set sharpening was used, as shown below, but there was no need to increase this. The handrail and window detail is sharp.

actar24mmrail

actar24mmwin

The auto merge in Photoshop CC2015 is extremely good. We had a slight edge to the left and bottom of the file when merging, probably due to the positioning of my tripod on the cobbled paving!

Select Content Aware when using auto merge and this will calculate the edge fill. Photoshop does a great job of this and as you can see from the image you can’t tell this adjustment has been made. The ant trail is shown on the image, select the Content aware tool and click on the ant trail to complete the fill.

contentawareblog

The Photoshop layered file to be stitched is 938.6MB layered file, 322MB (flattened.) The TIFF file is 1.59GB. The pixel dimension of the capture is 11456 x 4912 at 300dpi / Print output 38.18” x 16.37” 300dpi.

The images we use for the blog are 1080 wide at 72dpi, reduced to manage on the blog. The cropped imaged was taken from the middle of the panorama at 100% zoom. The file is 15.7MB, 2528 x 1087 at 300 dpi with a print output of 8.42” x 3.6” at 300dpi.

actar24mm_panorama21

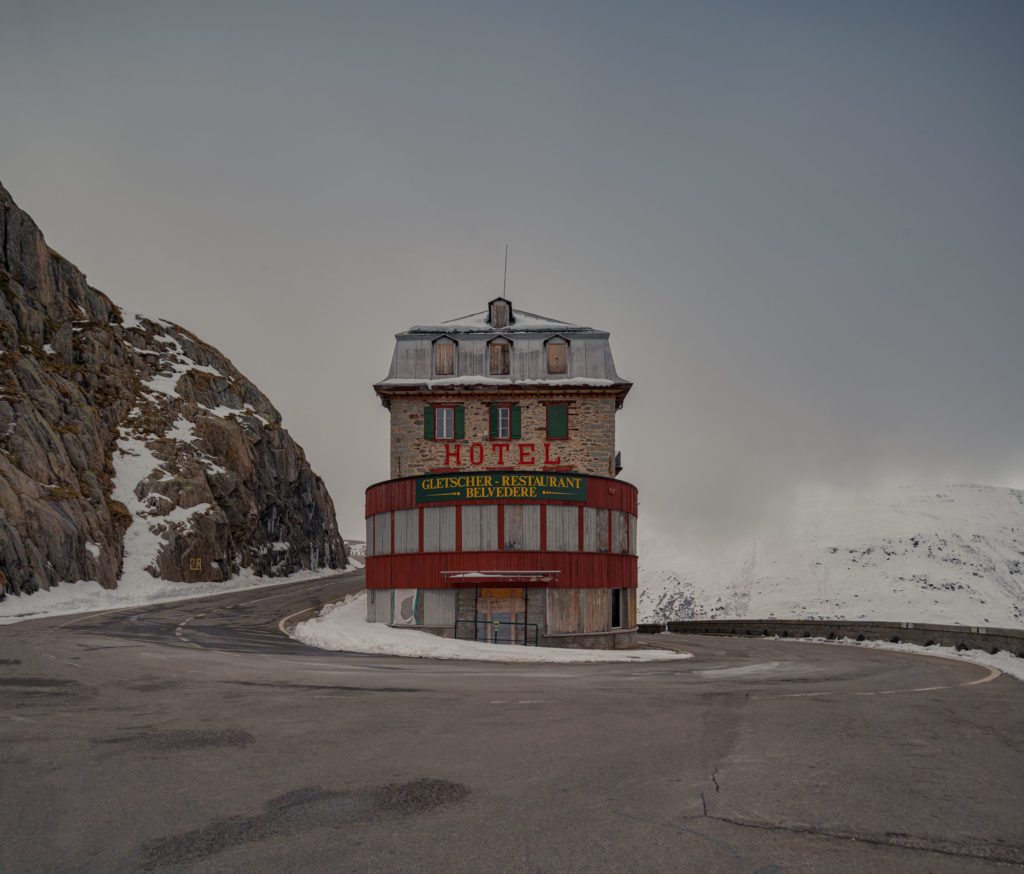
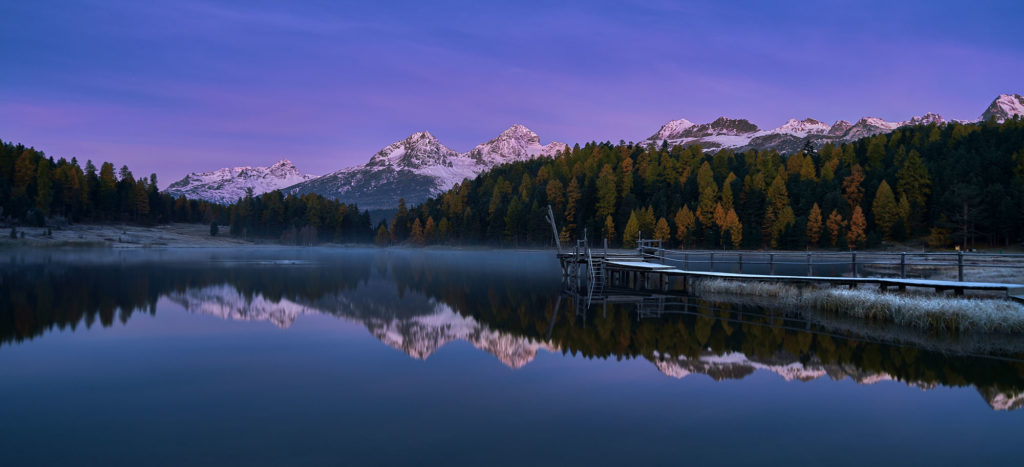
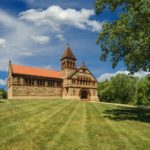
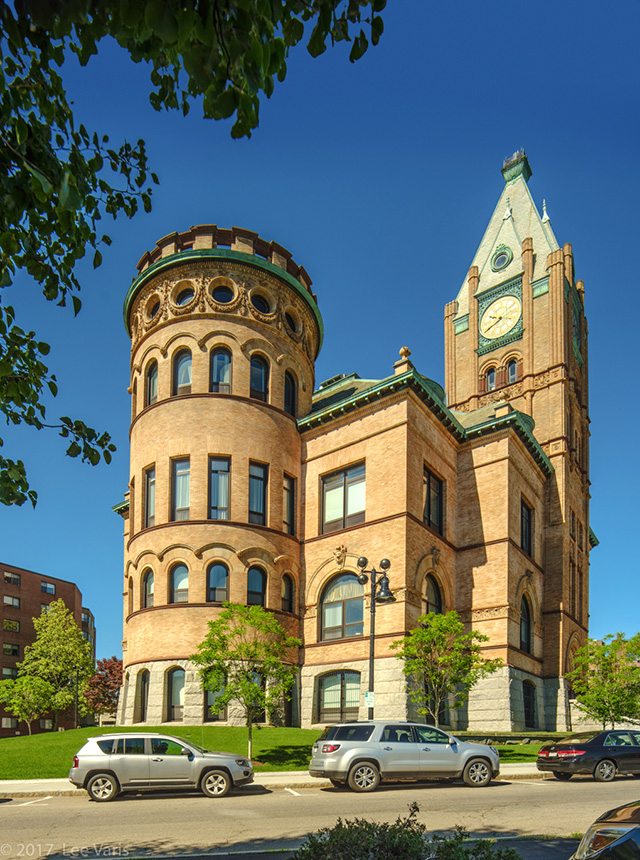
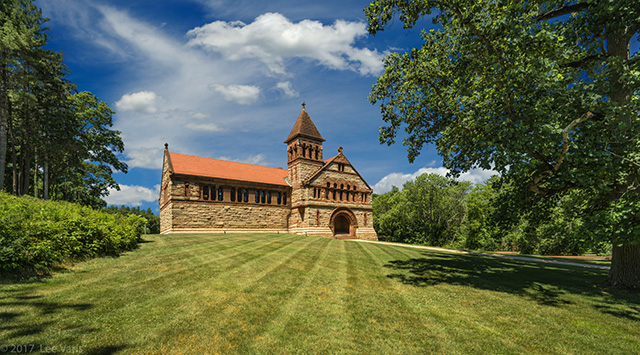
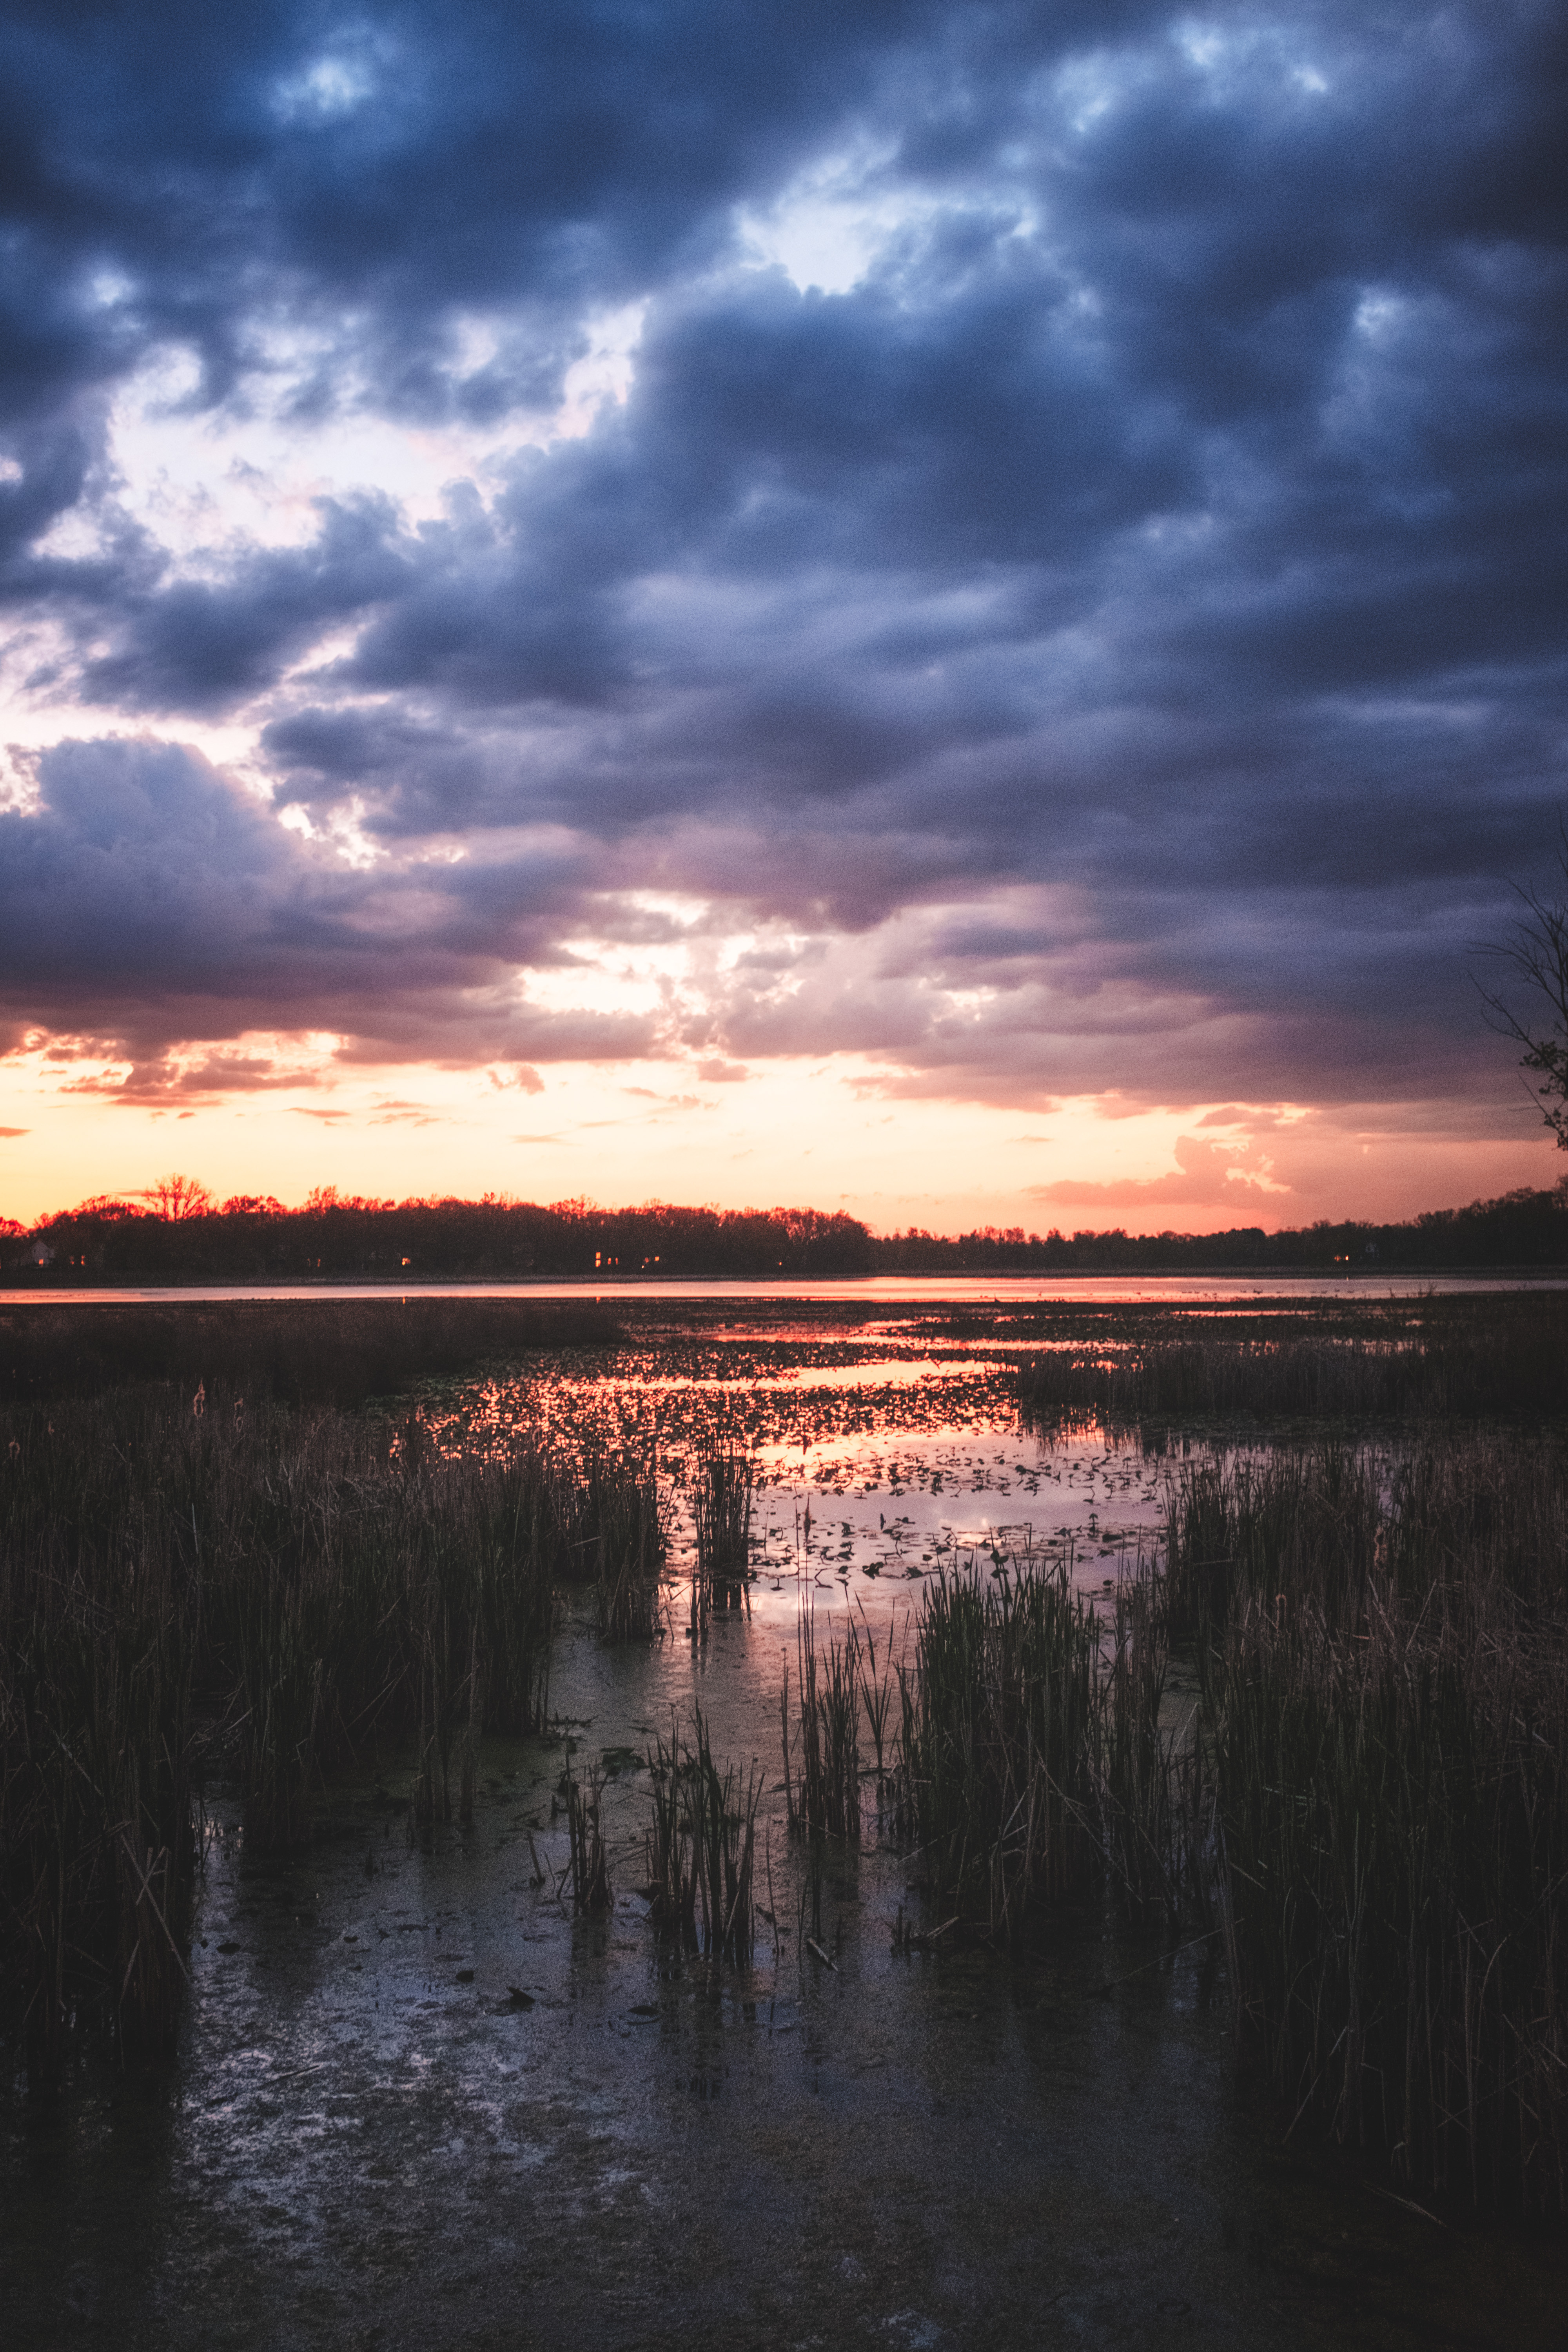
The day started and ended with mist. The image was captured around 2:30 pm and there was still a small amount of mist across the distant Elizabethan building.

actar24mm_pancrop2

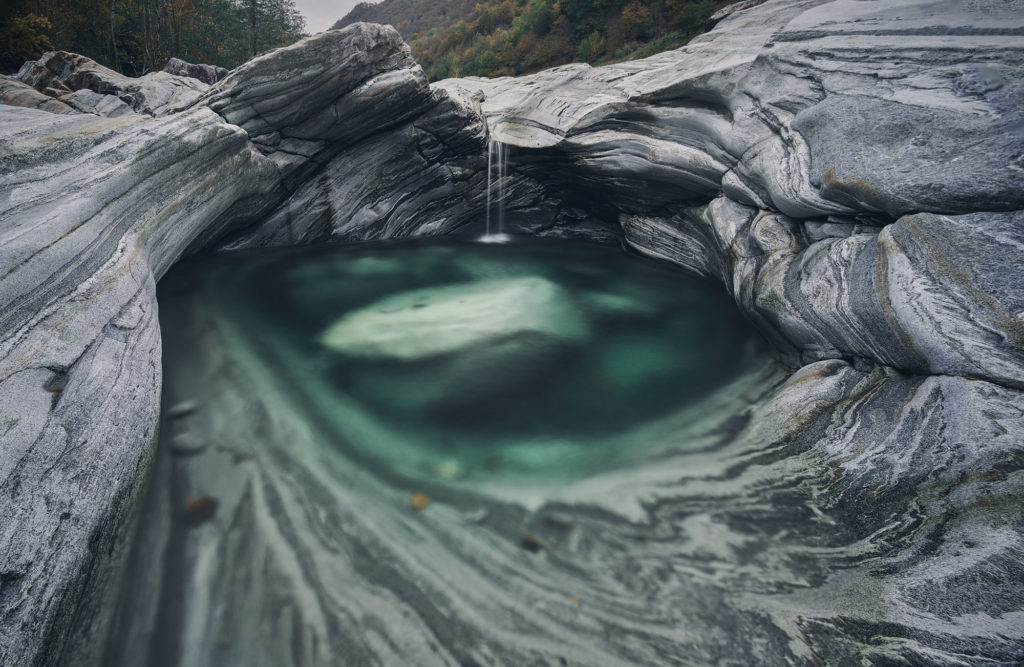
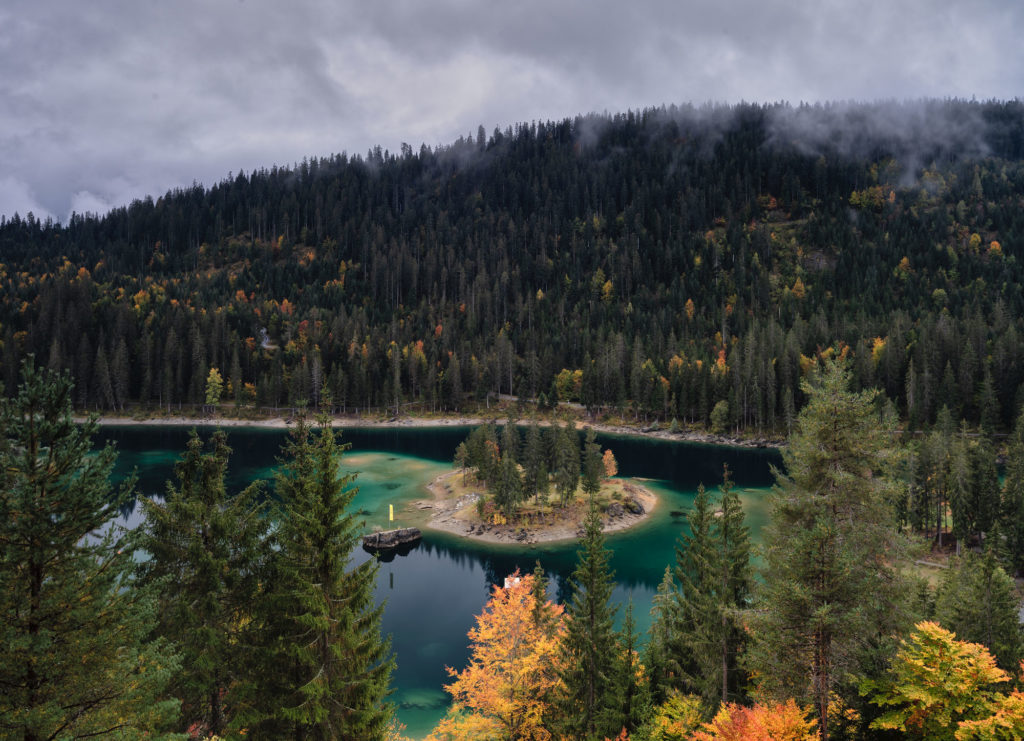
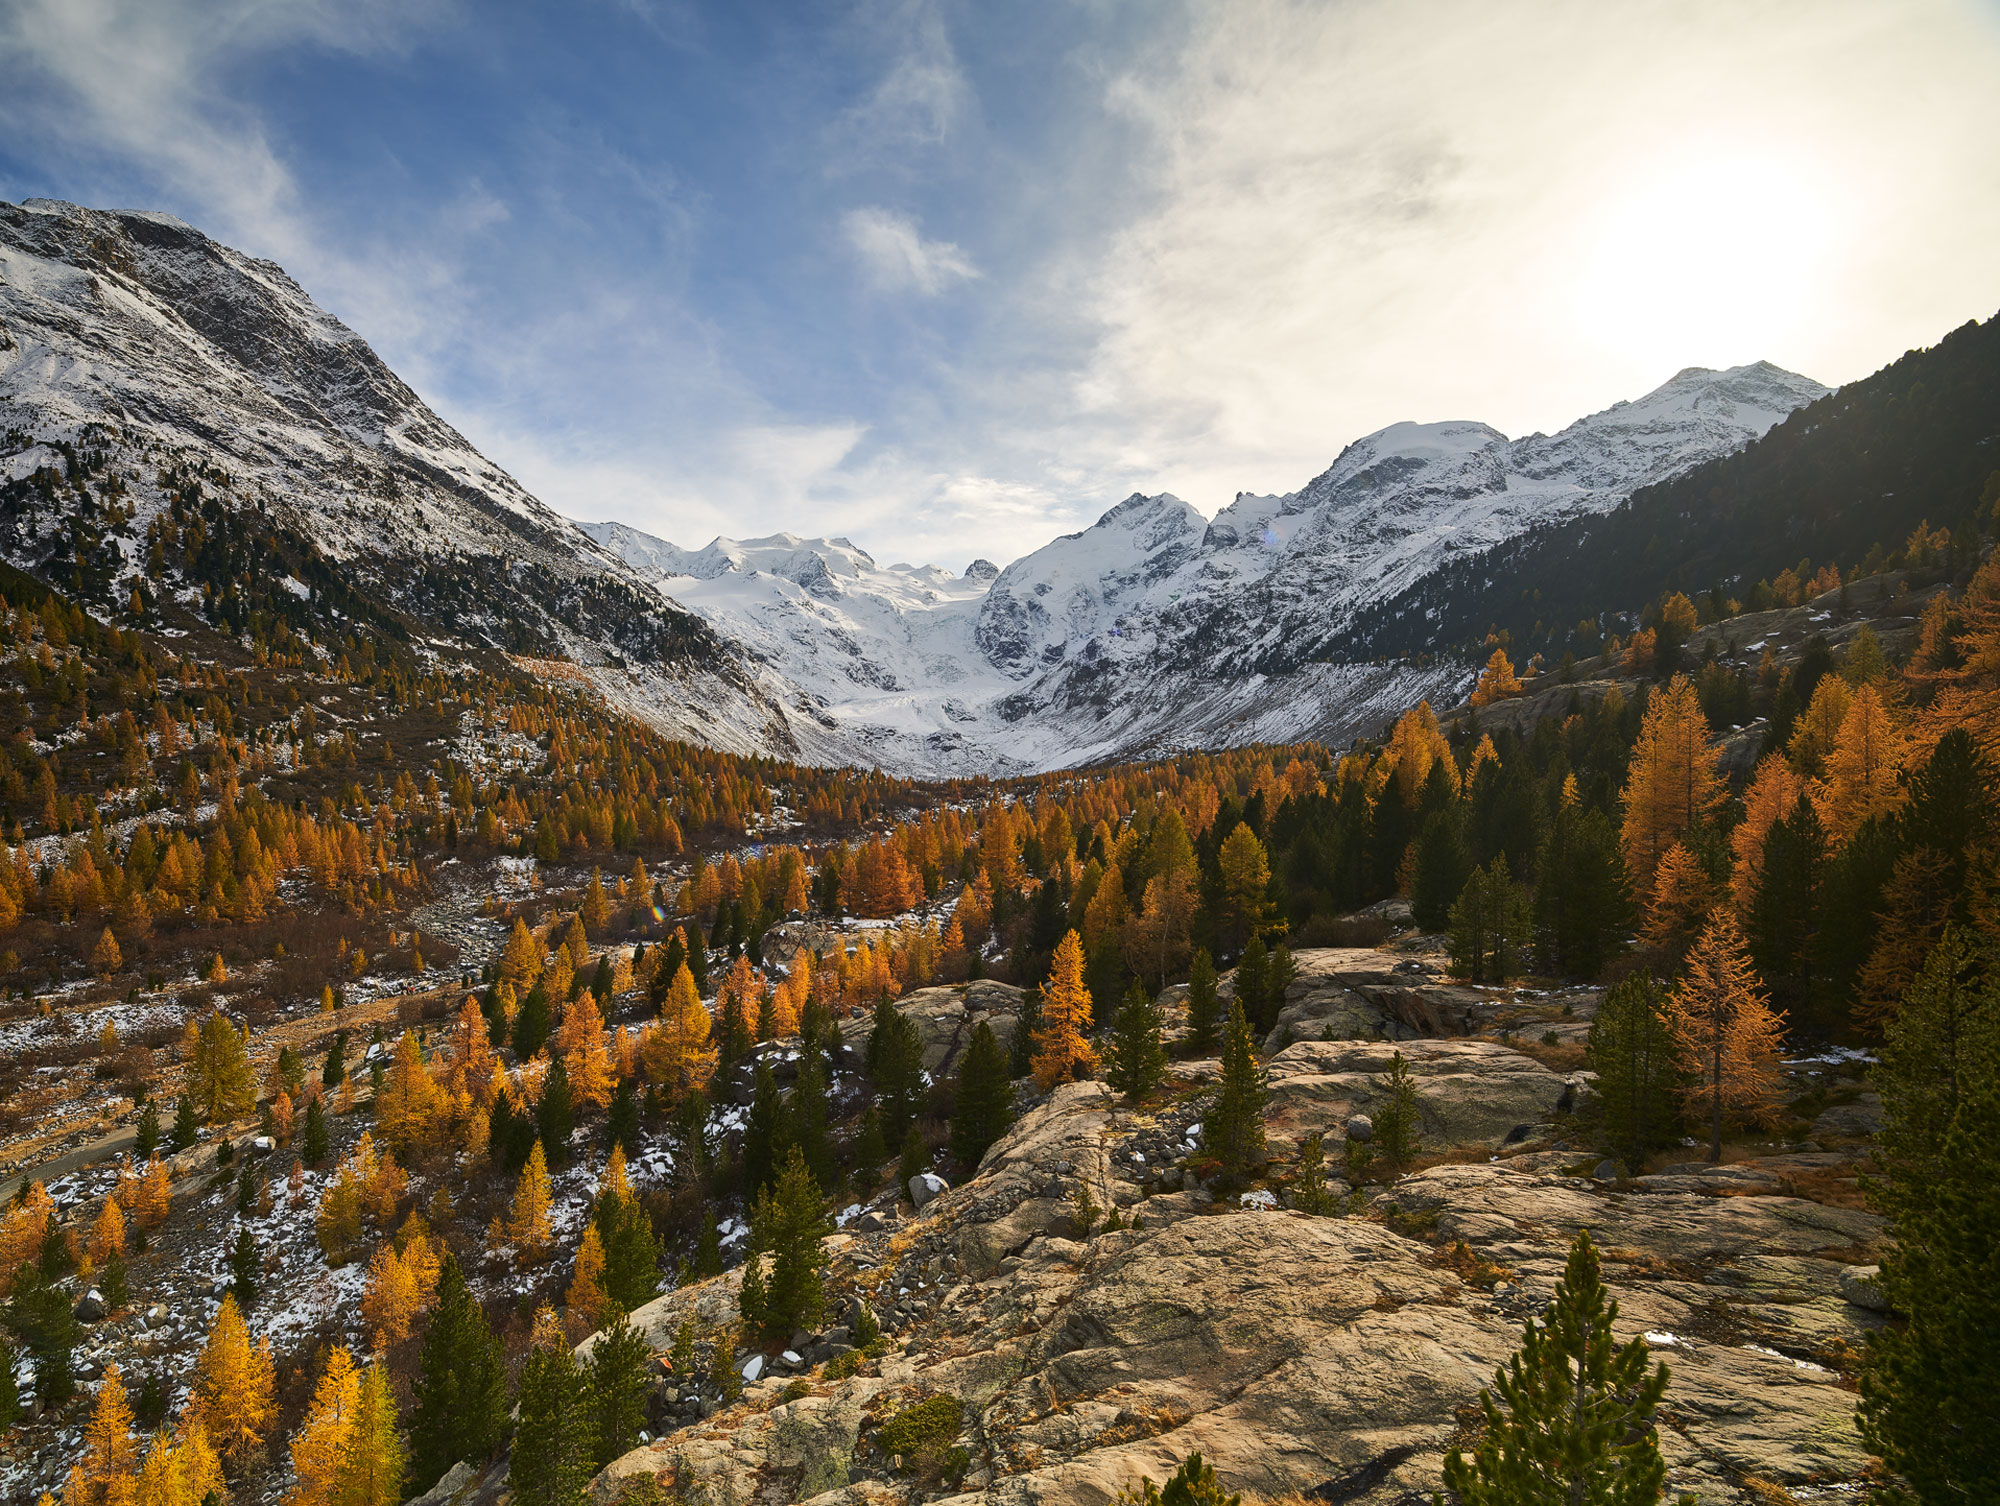
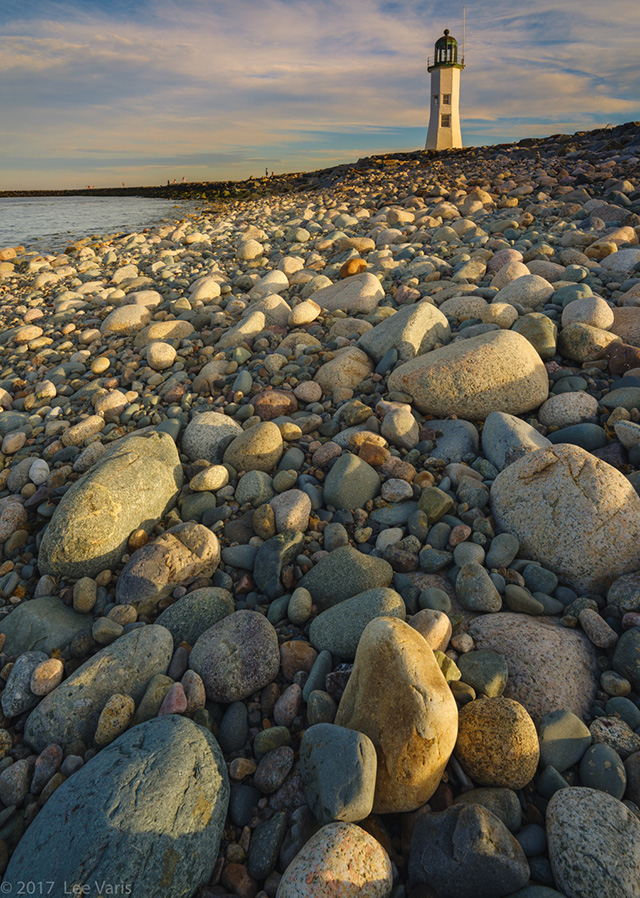
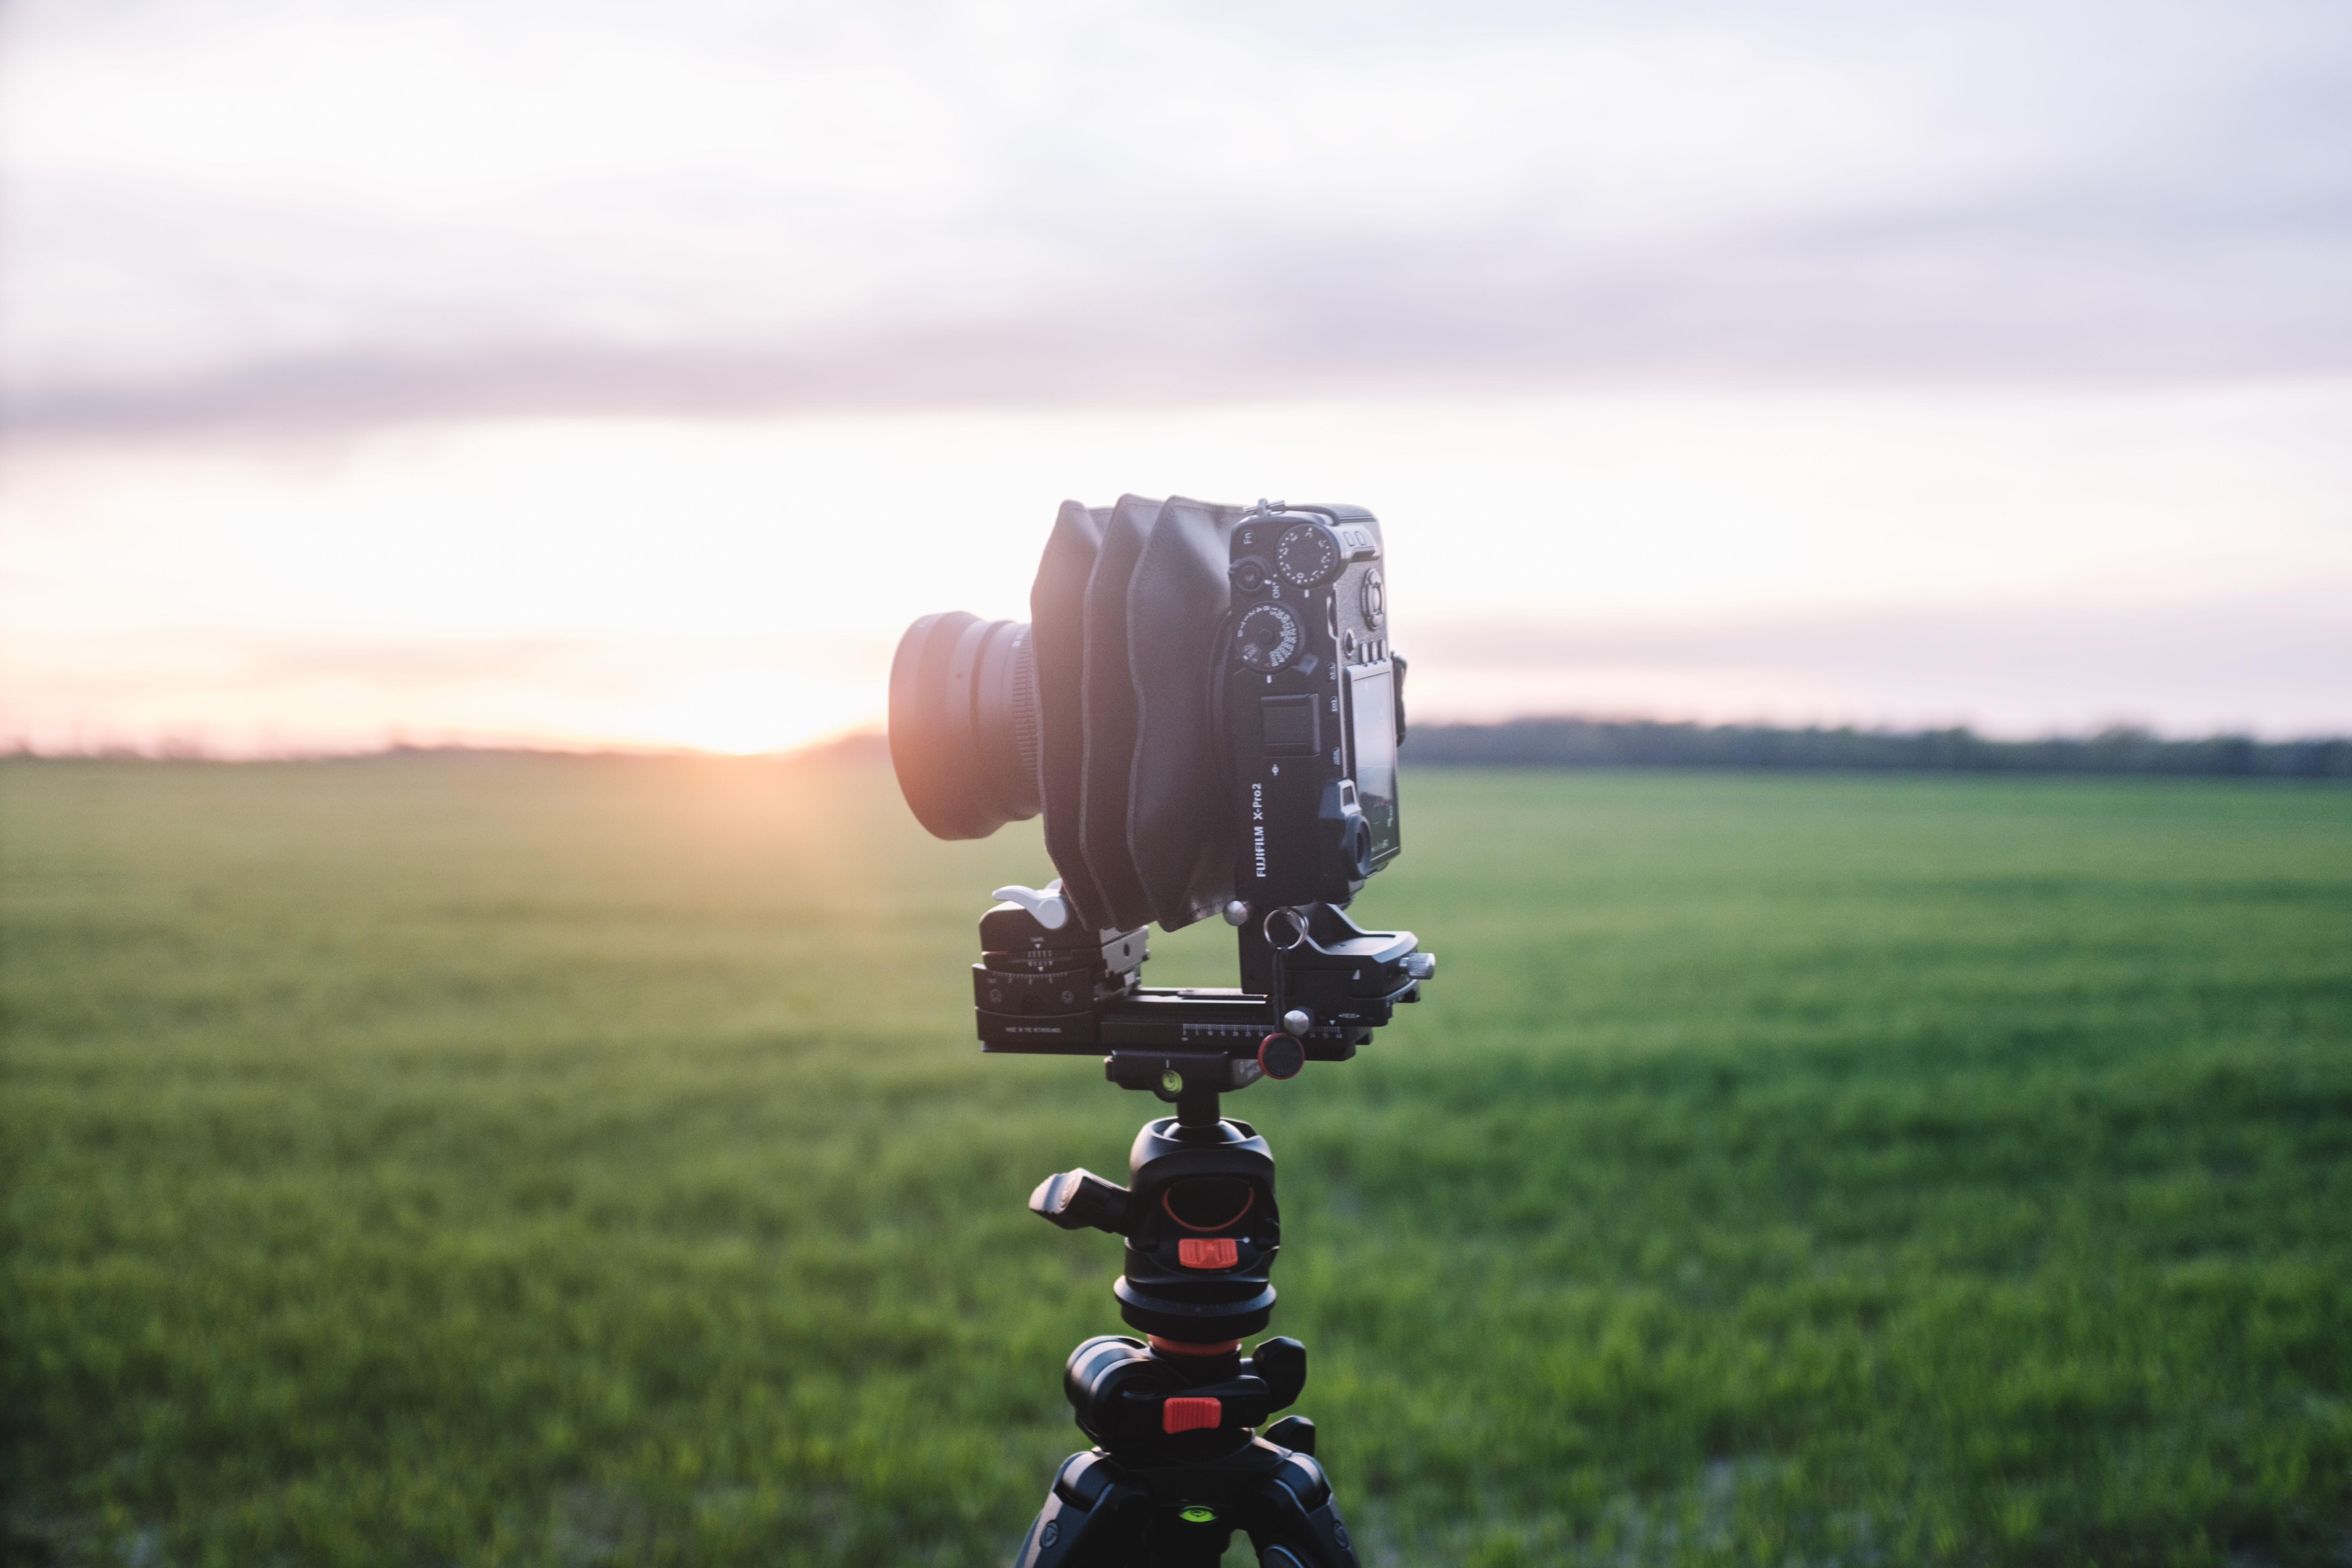
Following on from our shoot with the Actar 24mm, we were in a good location to capture images with the recently launched Actar 60mm f4 lens.

Within half an hour of shooting with the 24mm the light turned golden and although it looked warmer, trust me it was much colder!

charles2

The Actar 60mm is supplied fitted with a lens plate that slots directly in the front standard of the Cambo Actus camera platform. It is compatible with Mirrorless cameras. The large image circle of 75mm enables you to shift the camera body 19mm left and 19mm right, a huge 38mm shift producing an effective 66mm x 54mm stitched sensor capture – as its a longer lens there is not the distortion effect you obtain from a wide angle lens.

actar60lens

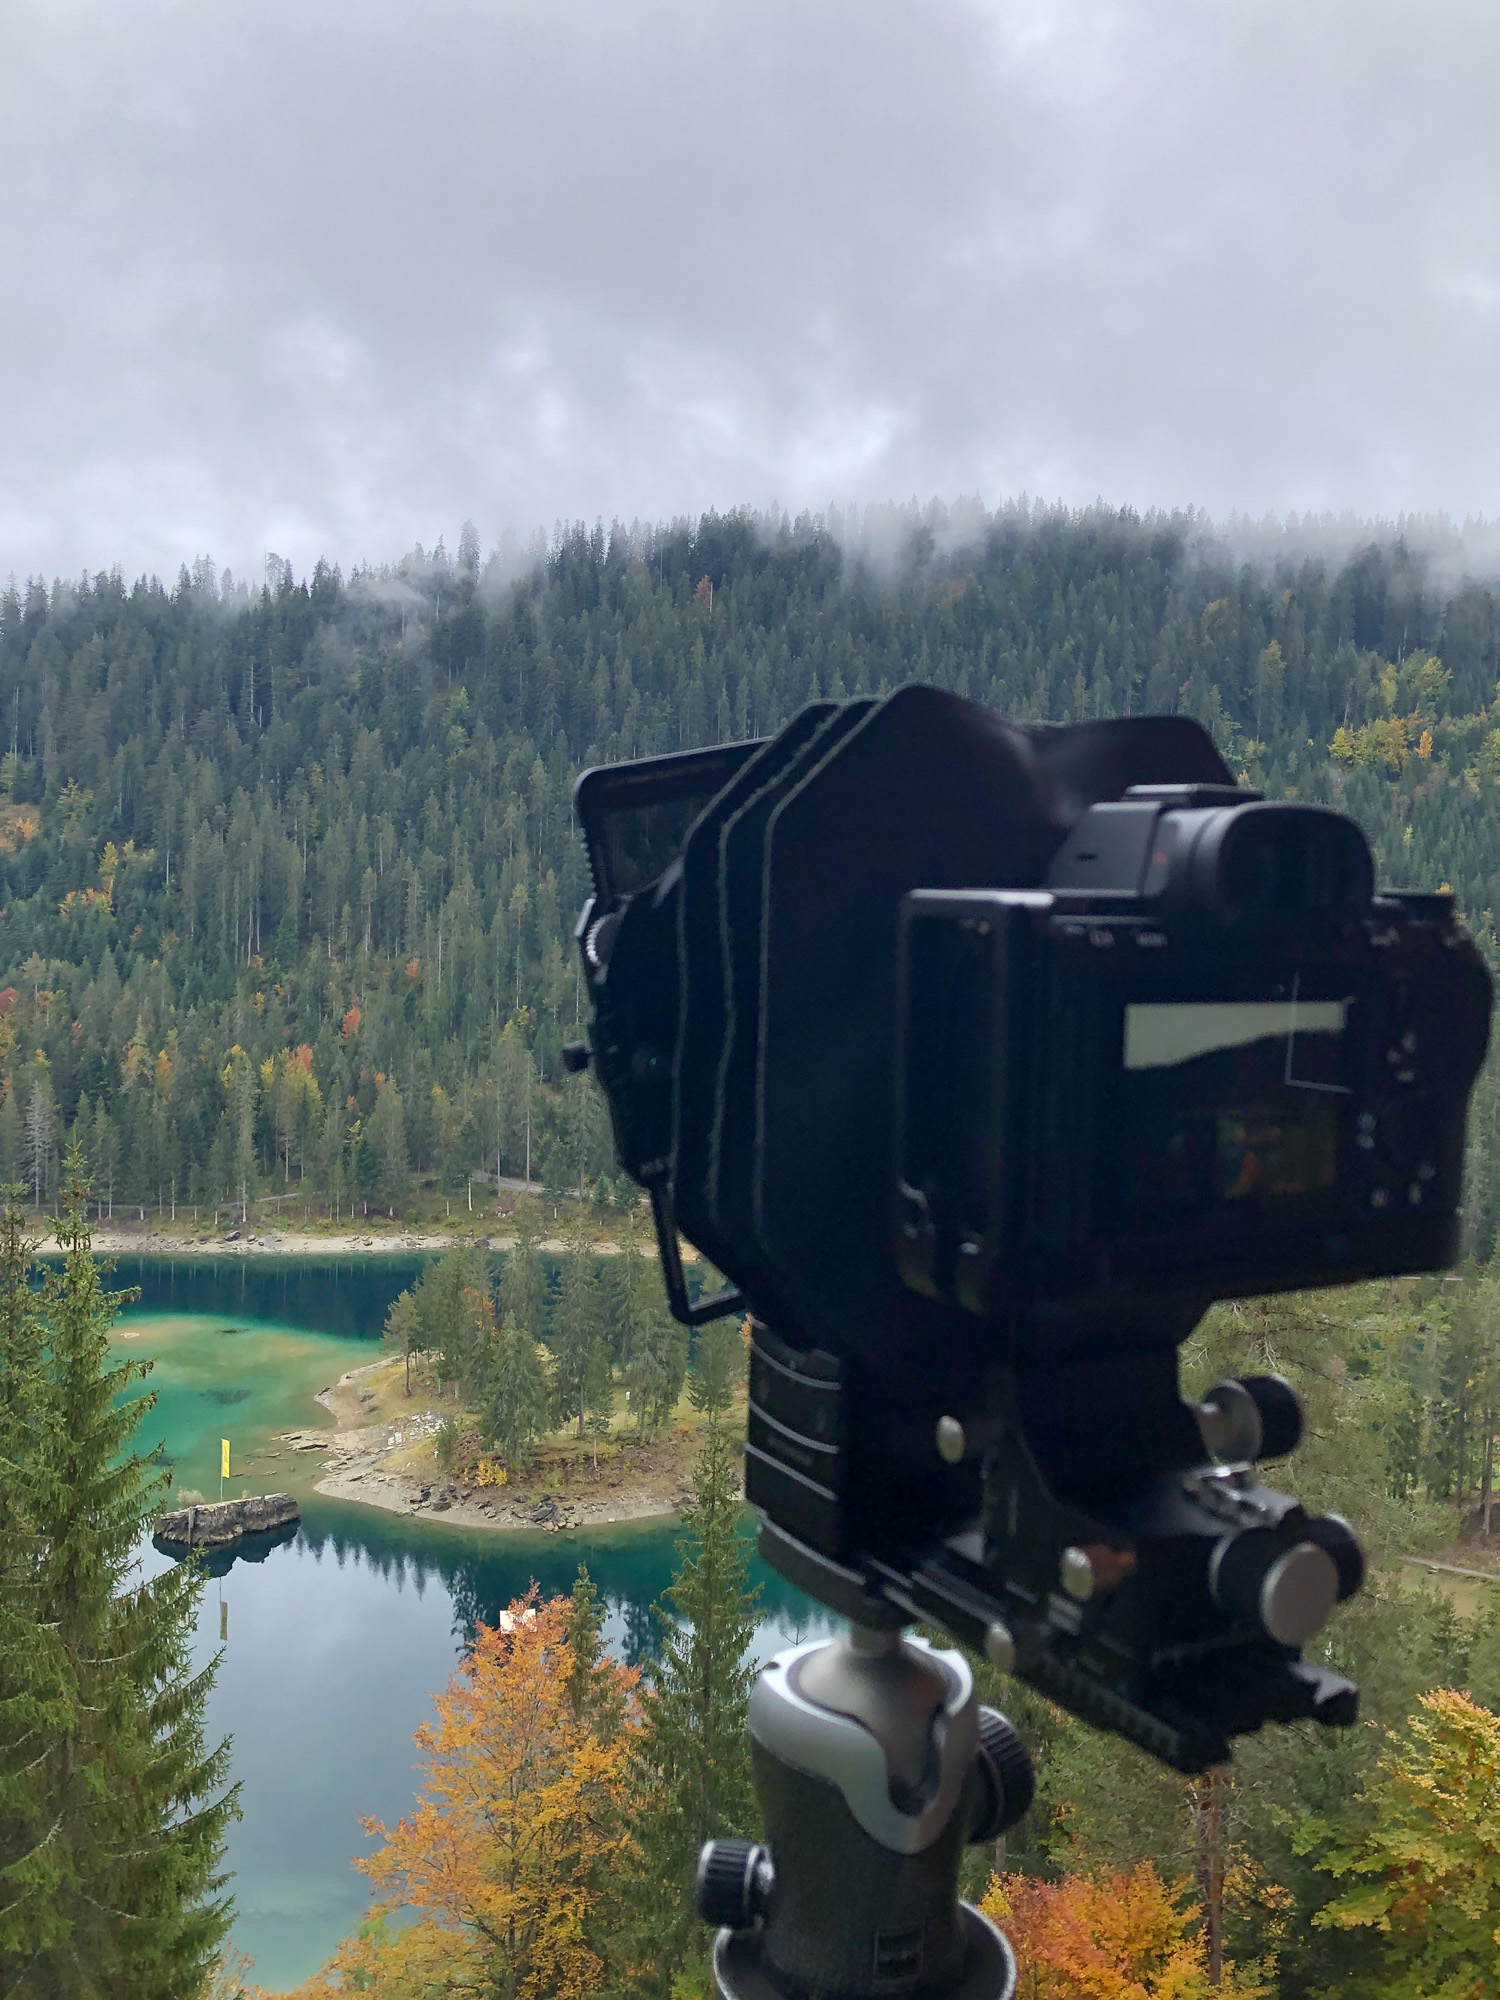
Again you need to find the infinity of the lens but this is easier to achieve, as it’s a longer lens. For this test we used the following; Cambo Actus Mini View Camera, Sony A7R, Actar 60mm lens, Standard bellows, CBH-6 ball and socket head and Manfrotto 055 CF tripod.

Using the Sony to meter the exposure at ISO50 was 1.0 sec at F16. The RAW file was captured with the generic Sony profile and a 2 second self-timer was used to avoid camera shake.

actar60mmmain

As already mentioned the lens image circle is quite large, 75mm, so can be shifted horizontally 19mm left and 19mm right. For this test we shifted 10mm left and 10mm right.

Once the RAW files were captured we imported the files into Capture One Sony Express and processed them using the Sony Generic profile, 16Bit and saved as a TIFF file to preserve the data. Capture One pre-set sharpening was used, as shown below; there was no need to increase this.

actar60mm3up

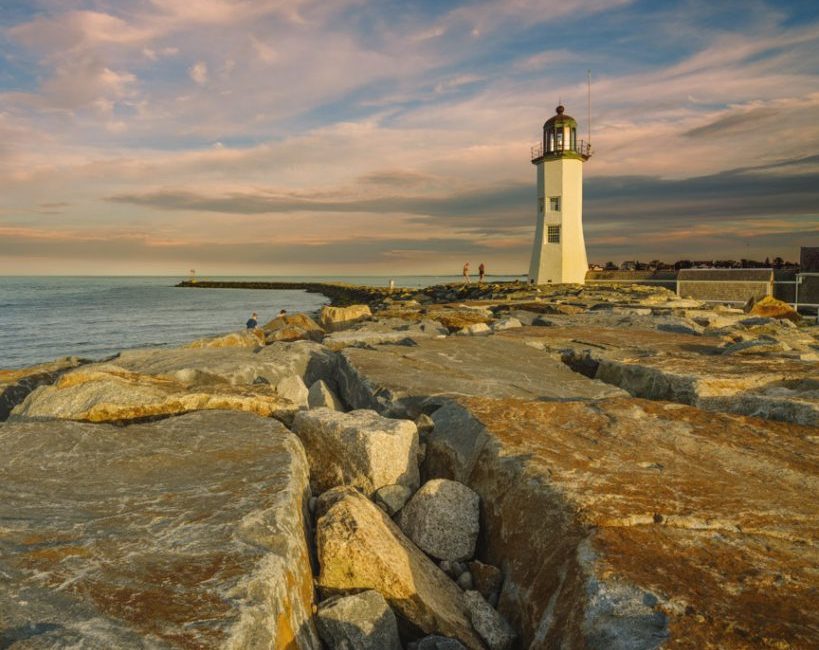
The only real change was the warmer natural light, so we enhanced the contrast to keep as much detail in the image. I prefer the warm light, its much more pleasing to the eye.

The Photoshop layered file to be stitched is 929.8MB layered file, 322MB (flattened.) The TIFF file is 1.24GB. The pixel dimension of the capture is 11456 x 4912 at 300dpi / Print output 38.18” x 16.37” 300dpi.

actar60mmpanorama

The Photoshop CC2015 auto merge, content aware and edge fill process was the same as when we processed the Actar 24mm files.

The images we use for the blog are 1080 wide at 72dpi, reduced to manage on the blog. The cropped imaged was taken from the middle of the panorama at 100% (approx.) zoom. The file is 8.8MB, 1893 x 812 at 300 dpi with a print output of 6.31” x 2.7” at 300dpi. I have been too generous with the crop produced by the Actar 24mm, as the size of these files should be the same.

actar60mmpancrop

The Actar 60mm is a better lens for this type of work. Of course longer lenses will suffer less with distortion and lens aberrations, we are also cropping into the image area, which is far more effective when shooting a panoramic image.


For further information about Cambo products contact your nearest dealer– Dealer Search.


November 30, 2016by CamboUSA
FacebookTwitterPinterestGoogle +Stumbleupon

Recent Posts

  • Cambo Introduces 2 New Lenses
  • Introducing the Smart Controller
  • Stepping Up
  • ACTUS-MV
  • Great Flavors & Wonderful Scenery

Categories

“Cambo BV was founded in The Netherlands in 1946 and has the distinction of being the first studio camera manufacturer to produce an all-metal large format camera. Based in the town of Kampen in the East of the Netherlands, Cambo has since built a reputation for high quality, precision engineered cameras, stands and other studio equipment.”

© 2019 copyright Cambo USA // All rights reserved