CHANGE PRICING TO USD, ADD CI CLOSER
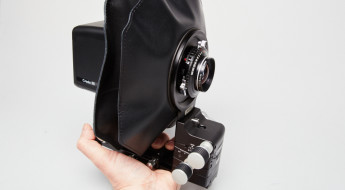
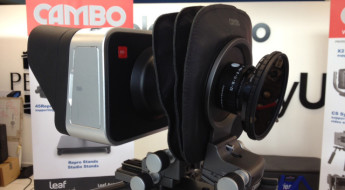
We invited John Grayston, Major Accounts Manager for Fuji to Cambo UK to take a look at the new Cambo ACTUS mini view camera. Armed with a case load of cameras and lenses John duly obliged to fit the Fuji XT-1 to the ACTUS and we took a series of images to show how easy it is to stitch them together.
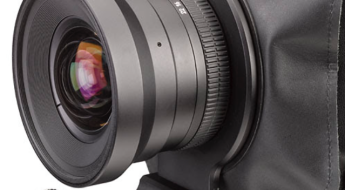
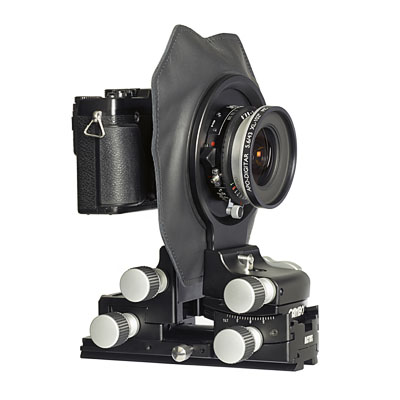
Here you can see the XT-1 attached to the ACTUS in the landscape position, there is a lever on the ACTUS to change the XT-1 to the vertical position, so you can also stitch in this position.


The XT-1 has a 16.3million pixel 23.6 x 15.5mm APS-C sensor producing a 33.6MB raw file measuring 4896 x 3264 pixels. We used the Photoshop plug in to open the file (now 45.7MB in Photoshop CC) and there were a few adjustments made to enhance the raw data to produce an image ready for the stitch.
As you can see we upped the sharpness and made some general modifications as you would expect to do with a digital file. Here you can see the before and after file (Screen grab images)


Using the shift and rise/fall on the rear of the ACTUS we are able to capture 9 images within the image circle of the lens. As you can see we are getting some vignetting but this is expected as we are moving the sensor to the edge of the lens.

There are several ways to stitch images and Photoshop CS does a reasonable job of stitching up to 3 images. However, in this case we have 9 images and manual stitching gives more control. So by increasing the canvas size of the file and adding each image to a layer it was pretty easy to line up each one to produce the final file. Some tone adjustment was made to the images to ‘blend’ each one, there is no set rule here other than what the photographer accepts visually and for print.
Final Files; The layered file size is now 339.5MB, 13577 x 8740 pixels at 300 dpi. Flattening the image and with a slight crop the final file is 283.9MB, 12126 x 8183 pixels at 300 dpi.

Final Image Adjustment; Normally we would remove the vignette from the raw file. I’ve colour balanced the image and for speed I have created a graduated layer of about 30% on a jpeg file to show you can remove the vignette if required. The small amount shown is acceptable as it draws your eye in, its up to you how much you apply providing the data is there.
Equipment used; Cambo ACTUS, Fuji XT-1, Schneider Apo Digitar 80mm lens, tripod, Apple Mac and Photoshop CC.
What will it cost? The ACTUS is around £1,320, Fuji XT-1 body £750, plus the Schneider digital lens is around £800. Prices are ex.VAT.
On a Budget? You can save on the cost of the lens if you have any legacy Hasselblad V, Mamiya RB/RZ/645pro, M39 enlarger lenses, Leica R, Nikon bayonet (Canon bayonet next year) you can fit these with the correct lens plate or buy a lens off the internet for a few hundred pounds. Its up to you! As always you get what you pay for and a 30 year old lens will not be as good as a new one, but there are some very good lenses out there.
Future proofing; The bonus of using the ACTUS is that you can upgrade the camera body, so if Fuji bring a new camera to market its likely to fit the ACTUS. You also have more option for lenses; the ACTUS turns the lens, even the trusty standard Hasselblad 80mm lens into a tilt/swing/shift lens!
John from Fuji was very impressed with the set up; as I was with the quality and handling of the Fuji XT-1.
“So the ACTUS is a portable 4×5 technical camera you can carry in your bag?”he said, “Wow, it’s great not only for landscape photographers but also for product photographers.”
You can find more information about the XT-1 click here: Fuji XT-1 Website Link